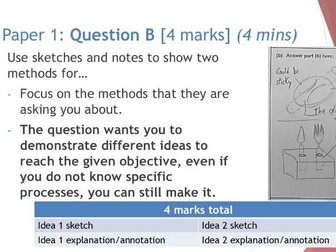
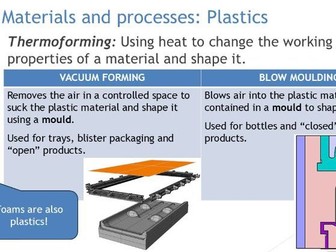
 Quick View
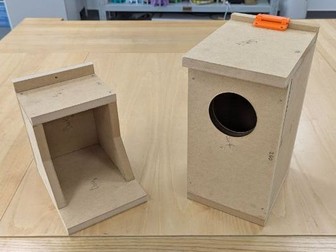
DT Practical Guide - Bird House and Feeder
This resource includes everything you need to create an engaging practical activity for your Design & Technology lessons.
You can use 1,2cm - 2cm wood thick for both projects.
REQUIREMENTS FOR STUDENTS:
A copy of the plan.
1,2cm-thick wooden boards (measurements in the file).
Ruler, try square, pencil, rubber, wood glue.
Hand saw.
Hammer and nails (2,5cm length)
INSTRUCTIONS:
Print a copy of the file for each student.
Follow the plan to mark the measurements on the wood.
Cut the parts.
Assemble as indicated in the plan.
Finish the product.
FINAL NOTES:
Students take 4-5 hours to finish the feeder.
Students take 5-6 hours to finish the house.
![DT Practical Guide - Small box with finger joints [Planter]](https://l.imgt.es/resource-preview-imgs/32a5cf05-144b-4b9a-a317-585f634b3974%2FMedia5.crop_419x315_38%2C177.preview.jpg?profile=res-img-med-legacy-v2)
![DT Practical Guide - Big box with finger joints [Planter]](https://l.imgt.es/resource-preview-imgs/af82d37c-ad93-49f0-9d36-2ef471f42650%2FMedia6.crop_466x349_143%2C97.preview.jpg?profile=res-img-med-legacy-v2)

![DT Practical Guide - Box with dividers [Planter]](https://l.imgt.es/resource-preview-imgs/4c7e033e-546f-46a2-ae8d-5552517a81ce%2FLALALALALA.crop_899x674_0%2C0.preview.png?profile=res-img-med-legacy-v2)