Design and Make a Wooden Box Full Project with Lesson PowerPoints Resistant Materials/Product DesignQuick View
DrDarTUKDrDarTUK

Design and Make a Wooden Box Full Project with Lesson PowerPoints Resistant Materials/Product Design

(1)
Full project to run with Year 9 or 10 students to design and make a wooden box by hand. This project uses CAD, 2D Design and CAM, the laser cutter to add a variety of different decorative techniques onto the box. The theme is modern designers and design movements. This is a fantastic, engaging and fun project to run for a term for KS3/4 students. Tried and tested resources, detailed and easy to follow, that take the hassle out of planning! 
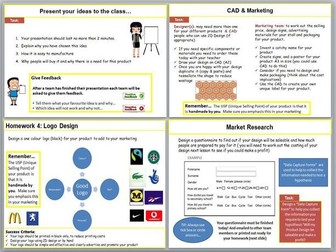
This resource includes a series of PowerPoints to run for a whole term, comprising of 15 one hour lessons. The lessons aim to provide everything you need, including Learning Objectives, Success Criteria, detailed tasks and step-by-step instructions. Each lesson PowerPoint includes starters, main tasks and homeworks. This is an ideal project to run prior to students embarking on their GCSE project as it follows the design process, has loads of practical tasks, is very detailled and is a smaller project version of a GCSE. A great opportunity to introduce and research into the following designers/design movements; > Alessi > Art Deco > Orla Kiely > Art Nouveau > Phillipe Starck > Memphis. During this project students will also research a variety of different decorative techniques including fretwork,sublimation printing, marquetry, inlays, overlays and combining materials. There is also a focus on learning about wood joints and producing their own finger joint. The lesson PowerPoints also cover the whole design process, individual lessons listed below. Lesson 1: Design brief, introduction to theme and research into designers/movements Lesson 2: Boxes product analysis and group feedback (use pictures of my boxes or your own collection) Lesson 3-4: Practical making a finger joint with step-by-step instructions 
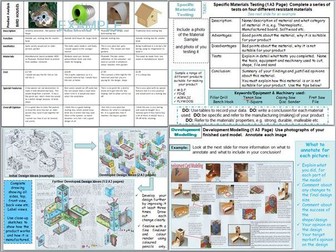
Lesson 5: Researching decorative techniques 
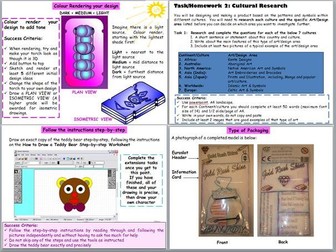
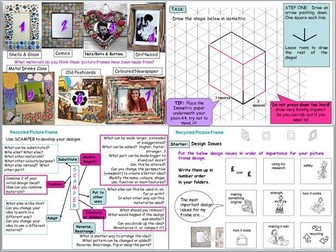
Lesson 6: Initial design ideas with exemplars Lesson 7: Development of initial design ideas with annotation prompts and examplars Lesson 8: Creating decorations using CAD (2D Design) and drawing Final design Lesson 9-10: Creating decorations using 2D Design and manufacturing using laser cutter Lesson 11: Practical lesson, includes full instructions and step-by-step instructions Lesson 12-14: Practical lessons, including step-by-step manufacturing plans Lesson 15: Testing and evaluation of finished product including problems and modification and annotation prompts Practical lesson PowerPoints include examples of previously made products and provide clear step-by-step instructions. to allow your students to follow at their own pace without constantly having to check with you!
Eco Fabric Bag full Project for Textiles, DT, based on 3 R's  Reduce, Reuse, RecycleQuick View
DrDarTUKDrDarTUK

Eco Fabric Bag full Project for Textiles, DT, based on 3 R's Reduce, Reuse, Recycle

(0)
Full Project, a series of ten fantastic one hour lesson PowerPoints, suitable for Year 7’s or 8’s to design and manufacture their own eco bag. Students will research all about the 3 R’s, Textiles decorating techniques and how to use the sewing machine to then design and manufacture their own eco bag. A fun and engaging project. This resource includes a series of PowerPoints aimed to provide everything you need, to run this project for 10 lessons; including Learning Objectives, Success Criteria and detailed tasks and step-by-step instructions. Each lesson includes starters, main tasks and homeworks. Also includes a sewing machine driving test and an extension task worksheet which is also suitable for setting as a cover lesson. Practical lesson PowerPoints clearly show examples of previously made products and provide clear step-by-step instructions. to allow your students to follow at their own pace without constantly having to check with you! Lesson 1: Design brief, specification and researching the eco theme of the 3 R’s. Lesson 2: Product analysis and initial design ideas Lesson 3: Peer evaluation and developed design ideas Lesson 4: Fabric decorative techniques, samples and testing Lesson 5: Learning how to set up and use the sewing machine Lessons 6-7: Decorating and printing fabric, sewing hems on bag Lessons 8-9: Sewing and manufacturing bag. Lesson 10: Final evaluation, including peer evaluation and analysis of testing.
Mini Enterprise Design Technology Project, 6 lessons, 1 hour lesson powerpointsQuick View
DrDarTUKDrDarTUK

Mini Enterprise Design Technology Project, 6 lessons, 1 hour lesson powerpoints

(0)
**An amazing series of six PowerPoints (one hour lessons) to run a mini enterprise project . An engaging and fun project, perfect to get your students to think independently and work as a team to produce a unique product. Encourage your students to be product designers, marketers and really learn how to make, package and sell products to sell at a school fair, exhibition or event. ** It is a great project to run to half term prior to an open evening or DT exhibition so students can set up a stall and sell their own products. Make a profit for your department and see the students huge level of interest when they actually sell their own handmade products. Each Lesson PowerPoint includes starters, main tasks and homeworks. Lesson 1 - Introduction of topic of Enterprise, identify your enterprising skills and choose a team to work with based on your skills. Lesson 2 - Evaluate what makes a good product, present design ideas, develop product design. Lesson 3 - Final design idea, working out the cost to manufacture the design idea Lesson 4 - Assigning job roles, Designing product on CAD, Marketing and Designing Packaging. Lessons 5-6 - Manufacturing, Designing and Marketing of the product ready to sell at the school fair/event.
GCSE full PROJECT set of  25 PowerPoints/Worksheets & Exemplars for A* Folder/ Portfolio of EvidenceQuick View
DrDarTUKDrDarTUK

GCSE full PROJECT set of 25 PowerPoints/Worksheets & Exemplars for A* Folder/ Portfolio of Evidence

(0)
All you need to teach Design Technology, Resistant Materials or Product Design at GCSE and help your student achieve top results for their portfolio of evidence/presentation folders. Each PowerPoint provides clear, detailed instructions and examplars to produce the best A3 folder sheet. The ultimate GCSE resource. Still works with new specification. The PowerPoints are designed to project during the class whilst doing folder work. They can be printed off for display and also provided to students to access for homework so they can work independently. Each PowerPoint provides a Lesson Objective, Tasks and Success Criteria. There are also exemplars of A+ graded work and very clear instructions so that students are able to clearly see what they need to produce a quality top grade piece of work for their final folders/portfolios. The 25 PowerPoints fully cover each section of the design process and every sheet you could imagine adding in a student’s portfolio of evidence. There are also extension tasks and additional sheets for more able students. Please let me know if there is anything I can do to improve this resource and leave me positive feedback if you find this resource useful. Thanks!
Pocket Torch CAD/CAM 2D Design Laser Cutter PROJECT, Full Lesson PowerPoints  RM, PD, ElectronicsQuick View
DrDarTUKDrDarTUK

Pocket Torch CAD/CAM 2D Design Laser Cutter PROJECT, Full Lesson PowerPoints RM, PD, Electronics

(0)
Full project to run with Year 7 or 8 students to design and make a Pocket Torch using basic components; an LED, Coin Cell, 2D Design and the laser cutter. A great introductory project to electronic products and mastering how to use 2D Design. The theme is different cultures and provides a great opportunity to research into the art and patterns of different cultures. This is a fantastic, engaging and fun project to run for a term for KS3 students. Tried and tested resources, so easy to follow and takes the hassle out of planning! This resource includes a series of 12 PowerPoints aimed to provide everything you need, including Learning Objectives, Success Criteria, detailed tasks and step-by-step instructions. Each lesson PowerPoint is judged to be suitable for a 1 hour lesson and includes starters, main tasks and homework. A dimensioned image of the 2D Design torch is included so that the template can be easily be created for your students to use, or they can draw their own (I would have uploaded the template file but 2D Design files are not supported). Also included is a bonus ‘How to draw a teddy bear in 2D Design worksheet’, fantastic as an independent learning activity as students can follow the worksheet and teach themselves how to use 2D Design. Lesson 1: Product Analysis of existing torch designs Lesson 2: Design Brief and Specification Lesson 3: Components, introduction to electronic products and drawing circuits Lesson 4: Initial design ideas Lesson 5: Design development and annotation with prompts Lesson 6: Learning how to use 2D Design Lesson 7-8: Drawing out design and patterns using 2D Design Lesson 9: Properties of materials, experimenting and testing (can be missed out if you are running out of time/lessons) Lesson 10: Manufacturing, laser cutting and sanding down edges of acrylic to achieve a quality finish Lesson 11: Designing and making packaging using a euroslot header Lesson 12: Evaluating product, including self and peer assessment (can be used as a homework if time is an issue) Practical lesson PowerPoints provide clear step-by-step instructions. to allow your students to follow at their own pace without constantly having to check with you!
MDF Memo Holder FULL PROJECT Y7/8, 11 lesson PowerPoints, Resistant Materials/Product DesignQuick View
DrDarTUKDrDarTUK

MDF Memo Holder FULL PROJECT Y7/8, 11 lesson PowerPoints, Resistant Materials/Product Design

(0)
Creative Creatures! Full RM project to run with KS3 students to design and make a wooden Memo Holder. Learning to work the coping saw and MDF. This is a fantastic, engaging and fun hands-on project to run, using tried and tested, easy to follow resources that take the hassle out of planning! 11 lessons to run over a whole term. Also included 4 bonus worksheets that you can use as extension tasks or cover work This resource includes a series of 11 lessons aimed to provide everything you need, including Learning Objectives, Success Criteria and detailed tasks and step-by-step instructions. Each lesson PowerPoint includes starters, main tasks and homeworks. Lesson 1: Learning all about woods; deciduous and coniferous trees and manufactured boards. Lesson 2: Writing a design brief and create a moodboard on the theme of 'Creative Creatures’ Lesson 3: Write a Specification and create a range of initial design ideas Lesson 4: Development of initial ideas using 4 x 4 task Lesson 5: Practical, learn how to use a coping saw, cut and finish a MDF fish sample Lesson 6: Practical, Health and Safety using the pillar drill to drill a hole in the MDF fish sample and applying a finish Lesson 7: Learn how to use a craft knife to produce a to-scale card model of final design Lesson 8-9: Practical, using a coping saw to produce final product in MDF Lesson 10: Practical, applying a finish and painting finished product. Lesson 11: Peer assessment and evaluation of final product. Practical lesson PowerPoints provide clearstep-by-step instructions. to allow your students to follow at their own pace without constantly having to check with you! Please leave positive feedback if you enjoy my resources. Thank you!
Recycled Picture Frame Project and Lessons with a Sustainable Design Theme. RM, PDQuick View
DrDarTUKDrDarTUK

Recycled Picture Frame Project and Lessons with a Sustainable Design Theme. RM, PD

(0)
Full project to run with Year 7, 8 or 9 students to design and make a Recycled Picture Frame using wood and decorating with sustainable materials. The theme focuses on the 3 R’s and provides a great opportunity to research into being more eco friendly and experiment with a range of different materials. This is a fantastic, engaging and fun project to run for a term for KS3 students. Tried and tested resources, so easy to follow and takes the hassle out of planning! Context: Sustainable Design Designers have a responsibility to design products that address environmental issues. Sustainability is a global concern and customers are increasingly seeking products which reflect this awareness. Design Brief/Task: Materials are thrown away every day and end up in landfill. The frame itself must be made using a manufactured board, which is less harmful to the environment. To make the frame more attractive investigate using materials that would normally be thrown away and could be reused to make a colourful and eye-catching design. You are asked to design and make a prototype. This resource includes a series of 10 PowerPoints aimed to provide everything you need, including Learning Objectives, Success Criteria, detailed tasks and step-by-step instructions. Each lesson PowerPoint is judged to be suitable for a 1 hour lesson and includes starters, main tasks and homework. Lesson 1: Design Brief and Introduction to the theme of the 3R’s and Sustainability Lesson 2: Writing a Specification Lesson 3: Drawing in Isometric, crating and colour rendering Lesson 4: Initial Design Ideas Lesson 5: Development-Testing and sampling of eco materials Lesson 6: Developed design ideas using SCAMPER and peer assessment Lesson 7: Modelling developed design in card Lesson 8: Planning a plan of make Lesson 9-10: Practical making Lesson 11: Final evaluation Lesson PowerPoints can be amended as required if you feel your student need more time on any parts of the design and manufacturing process.
How to Make a Sublimation Printed Keyring using 2D DesignQuick View
DrDarTUKDrDarTUK

How to Make a Sublimation Printed Keyring using 2D Design

(1)
A detailed step-by-step showing you how to make a sublimation printed keyring using a design already created in 2D Design. A great idea and resource for a Graphic Products, Product Design or Resistant Materials class. Project the instructions on the board and let your students use it as a guide or as reference to produce their own step-by-steps.