VEX Robotics IQ Curriculum - VEX IQ Robotics ProjectQuick View
VEX-PaulVEX-Paul

VEX Robotics IQ Curriculum - VEX IQ Robotics Project

(4)
The project concentrates on the exploration individually and in teams of the VEX IQ kits, leading to a design and build response. Through the project pupils will be able to develop a keen and focused level of knowledge of robotics design, but in the context of VEX IQ parts. The challenges and learning are based on a US STEM curriculum map, but have been converted to a UK format for the delivery of up to date and modern Design and Technology for primary and secondary school. * Lesson 01 – Pupils will learn about the need for problem solvers and about the five different types of engineering. They will also develop an understanding of STEM, Engineering and Robotics, including robot control. * Lesson 02 - Pupils will start to recognize VEX IQ hardware parts and components visually. They will learn hardware functions and will pair their Controller with the Robot Brain. * Lesson 03 – Pupils will learn about and utilize design process. They will be able to follow instructions to build a functional VEX IQ robot, and troubleshoot and solve problems to improve design. * Lesson 04 – Pupils will learn about the 6 types of simple machines visually. They will also learn key terminology related to motions, and simple machines make work easier. They will then begin to apply knowledge through build and design activities. * Lesson 05 - Students will learn key terminology related to Chain Reaction Devices. They will apply knowledge of Simple Machines and Pendulum, and will follow assembly instructions to build a sample Chain Reaction Device. * Lesson 06 - Pupils will learn about and apply knowledge of Friction. They will learn about and apply knowledge of Centre of Gravity and Mechanical Advantage * Lesson 07 - Students will learn about DC Motors, and apply knowledge of Gear Ratio. They will learn about Object Manipulation, Lifting Mechanisms, and Drivetrains. * Lesson 08 - Pupils will utilise and document design process, troubleshoot and solve problems to improve design, and participate in the add up challenge. * Lesson 09 – Pupils will learn key terminology related to sensors and programming, learn sensor types and capabilities, and utilise design process through programming exercises. * Lesson 10 - Students will apply knowledge of Simple Machines and Pendulums. Students will review terminology and the design process in building their own Chain Reaction Device. They will then go on to apply knowledge of VEX IQ sensors as well as programming techniques to improve the design. * Lesson 11 – Pupils will work in teams to build and programme and robot to complete a task using problem solving and by reviewing sensor types and capabilities, design process, and programming challenges. * Lesson 12 – Pupils will use this lesson to review and document the design process. Students will be use this to improve design and use this when participating in the Add it Up Challenge.
VEX Robotics EDR Curriculum - Introduction to RoboticsQuick View
VEX-PaulVEX-Paul

VEX Robotics EDR Curriculum - Introduction to Robotics

(2)
In this full scheme of work, designed for a series of two-hour double-lessons, students develop a Mars Rover for NASA based on a standard VEX design. They learn about the components of a robotics system including control units and data communications, and work through a design process towards a prototype. The VEX robotics system is modular, allowing for students to create a common design and then develop their own ideas. The lessons are as follows: *Lesson 1: An introduction to robotics and the context of robotic space exploration, specifically a Mars rover. It includes an overview and a definition of robotics, and a research task. *Lesson 2: Students investigate the mechanical components that comprise the modular VEX system. They work in teams to build a ‘ClawBot’, a basic wheeled robot with a movable, clawed arm. *Lesson 3: Electrical wiring and control circuitry is added to the robot, which is then tested. Team task-management approaches are used to ensure everyone has an active role. An optional activity involves programming the robot using RobotC, a programming language specifically designed for the VEX microcontroller. An extension research task examines the work of NASA. *Lesson 4: This lesson delves into the NASA design brief – to prototype a robot for exploring Mars. Students work to produce a design specification based on their product research, and sketch ideas. *Lesson 5: Students present their design ideas to their team, and a joint design is decided upon. They make notes in an engineering notebook, recording how and why decisions were made. Teams may start to build their chosen design. *Lesson 6: Students create their prototype robot and have the chance to add sensors to it. They may also program the robot to act autonomously. Students evaluate their solutions against their design criteria. *Lesson 7: The robot is fully tested against the team’s criteria, and prepare a presentation. Team leaders assign roles to individuals to ensure they work to deadlines. *Lesson 8: Teams make their presentations to an ‘expert panel’ made up of teachers, STEM Ambassadors or others. They then review their presentation and the project itself.
VEX Robotics EDR Curriculum - Unit 2.0: Clawbot BuildQuick View
VEX-PaulVEX-Paul

VEX Robotics EDR Curriculum - Unit 2.0: Clawbot Build

(1)
The project concentrates on the design and manufacture of a VEX Clawbot using a prepared kit of robotics parts. The build is clearly led as a team assignment and leads to a specific outcome. Once the build is complete, pupils are challenged to extend the application of the kit and robot to lead to different and ever more complex outcomes. The Clawbot will be redeveloped and rebuilt, programmed and engineered to result in new and engaging solutions. Through the project pupils will be able to develop a confident and detailed level of knowledge of robotics design, and will be able to apply this to VEX challenges. 1. * Lesson 01 - Introduction to the project and discussion about robots in society, their applications, and different types that might be seen in the near future. Pupils prepare and present short presentations about why we need or use robots in society and industry. 2. * Lesson 02 - Pupils learn about roles of the team of 4. Pupils will then start on the Clawbot with their individual roles set out with support documents on how to build the step by step. 1. * Lesson 03 Teacher commences the lesson with a discussion about fault finding with the VEX Clawbot as it is currently assembled. Pupils are then tasked with identify and sketching design faults on the Clawbot and design solutions they could develop and re-engineer with their kit. 3. * Lesson 04 - Pupils are introduced to the topic of wireless technology and the context under which it supports Robotics. Pupils learn how to programme the cortex using a controller programme in RobotC. 1. * Lesson 05 - Pupils are introduced to the Sack Attack game. Pupils will watch be shown tutorial videos on using RobotC to programme autonomous operation of the Clawbot. They will focus on what to assign to motors and why, how to change their values, and how to time activities. Pupils will then carry out assigned tasks before an autonomous challenge of scoring as many times as they can in a 15 second spell. 1. * Lesson 06 - Pupils are reminded about the sensors from the previous unit and what they each do. Pupils look at the bump, limit and ultrasonic and their uses for a Clawbot. And modify their Clawbot by fitting sensor to the arm, front, and back so that the Clawbot responds to itself and its environment. 1. * Lesson 07- 12 - Pupils are set a design challenge and need to decide if they choose to create an autonomous outcome or a controller outcome. Pupils use their time to design, sketch, build and modify their robot so that it meets or can adapt to the challenge set out. Teams will need to prove their robot works. Pupils are then tested as a group/individuals using plenary questioning.
VEX Robotics EDR Curriculum - Unit 1.0: TumblerQuick View
VEX-PaulVEX-Paul

VEX Robotics EDR Curriculum - Unit 1.0: Tumbler

(1)
The project concentrates on the design and manufacture of a TD Tumbler using VEX robotics parts. The build is relatively simple ensuring success for all pupils new to VEX robotics. Once the build is complete, pupils must design and create a unique RobotC program which will give desired control of the robot, using sensors which must also be carefully fitted to the Tumbler frame depending on the application. Through the project pupils will be able to develop a keen and focused level of knowledge of robotics design, but in the context of VEX parts. * Lesson 01 – Introducing the aim for the unit’s project, pupils will Learn about robots, force and motors. Be able to label features of a DC motor. * Lesson 02 – Pupils will develop an understanding of simple frame design and the building techniques required to create simple robot design solutions. * Lesson 03 – Pupils will learn how motion is created in robotics and how different types of motion can be achieved. * Lesson 04 – Pupils will then move on to understanding how power can be used to achieve functional robotics and how batteries differ and can be used for VEX. * Lesson 05 – Pupils will Learn how robotics are controlled and how this supports modern manufacture and industry. Working with a control programme, pupils will then learn about how programming works. * Lesson 06 – Pupils will develop an understanding of how inputs such as sensors help robotics to function, and work with a range of sensors to achieve a desired level of control and functionality. * Lesson 07 – Then will then go on to Learn how to apply sensors to different scenarios and how sensors can add accurate control. They will then apply sensors to a range of simple challenges. * Lesson 08 – Reviewing their knowledge, pupils will respond to different design challenges by applying new skills learnt through the build and programming of a quality product. * Lesson 09 – Pupils will then adapt their designs to meet new challenges, needs and for different users. * Lesson 10 – This lesson will allow pupils to test and prove your product against set goals to prove functionality. Adapt the design solution to meet the criteria for the product better. * Lesson 11 – Pupils will get to create a new and unique product solution using a range of sensors, control programming and the application of CAD software. * Lesson 12 – Pupils will review the learning over a period of time, reflect on your progress, and set new targets for your next project in a different (or similar) material area.
VEX Robotics IQ Curriculum - Mix 'n' Match CurriculumQuick View
VEX-PaulVEX-Paul

VEX Robotics IQ Curriculum - Mix 'n' Match Curriculum

(1)
This collection of VEX IQ Curriculum is designed so you can Mix 'n' Match the lesson content and number of lessons to your individual needs. Each lesson is created to act as a standalone unit, so if you want to focus on one specific subject this is possible. You are also able to link lessons into longer Schemes of Work that are based around linked topics - such as mechanical advantage, inputs/outputs or programming. This bank of material will be updated regularly, so please ensure you check back often. Feedback on lesson content is also very welcome -paul_mcknight@vexrobotics.com * Lesson 01 - VEX IQ Basebot Build lesson looking at the basic build of the IQ Basebot that can be used as the core of many Mix 'n' Match Lessons. * Lesson 02 - VEX IQ Linear Movements lesson looking at basic linear movement using the 'time' and 'rotation' functions and the effect of power. * Lesson 03 - VEX IQ Turning In Place lesson looking at the basic turning movements using the 'Turn Left' and 'turn Right' functions and the effect of power. * Lesson 04 - VEX IQ Bumper Switch lesson using the Basebot robot and the basic use of the Bumper Switch sensor. * Lesson 05 - VEX IQ Touch LED Lesson using the Basebot robot and the basic use of the Touch LED sensor. * Lesson 06 -VEX IQ Distance Sensor lesson looking at the use of ultrasonic distance sensor and programming using the 'getDistanceValue' function. * Lesson 07 - VEX IQ Colour Sensor lesson looking at the use of the colour sensor and programming using the 'getColourName' function. * Lesson 08 - VEX IQ Gyro Sensor lesson looking at the use of colour sensor and programming using the 'getGyroDegrees' function.
VEX Robotics EDR Curriciulum - Unit 2.1: Autodesk Inventor Clawbot BuildQuick View
VEX-PaulVEX-Paul

VEX Robotics EDR Curriciulum - Unit 2.1: Autodesk Inventor Clawbot Build

(1)
As a project encouraging pupils to learn how to work in a new CAD package, the aim for each individual is to follow the stages of build to recreate the Clawbot product, before adapting its design and function based on their experiences of working with real VEX equipment. The project concentrates on the accurate application of CAD to produce a dynamic moving assembly of parts, which pupils can use to render, carry out a stress analysis, or simply personalise with changes to material appearances. Once the basic Clawbot has been modelled, pupils are encouraged to introduce new parts, develop the perceived function of the product, and move beyond the step by step tutorial approach of the early lessons. The students will spend time developing their ability to problem solve, work within assemblies, adapt existing modelled parts, constrain and join components together, establish good methods of modelling, and complete the entire build of a VEX Clawbot. *Lesson 1. Pupils will be encouraged to discuss an overview of the Clawbot build by reinforcing the Autodesk Inventor environment to the students. Pupils will then begin to build up the first elements of their Clawbot, and log progress and findings into an engineering notebook. *Lesson 2. Pupils showcase their model progress to their peers and present to one another about how they modelled their Clawbot parts, and continue to build up further elements of their clawbot. Each student will need to ensure they document in their engineering work books the steps completed, the tools and parts used, and the issues that arose. *Lesson 3. Pupils are set tasks to differentiate the model they create, including setting unique briefs for pupils to work to once the Clawbot has been modelled.Pupils will design additions they plan to add to their Clawbots, build and finish their Clawbot robot build, and work through their notes from the engineering notebook to personalise the robot for a unique task.
VEX Robotics EDR Curriculum - Unit 1.1: Autodesk Inventor Tumbler BuildQuick View
VEX-PaulVEX-Paul

VEX Robotics EDR Curriculum - Unit 1.1: Autodesk Inventor Tumbler Build

(1)
VEX Robotics EDR Curriculum - Unit 1.1: Autodesk Inventor Tumbler Build looks at the process of constructing a virtual VEX Tumbler within the Autodesk Inventor software environment using the available digital VEX Robotics parts. This virtual robot can then be tested and modified using the tools available in the software. Please send comments and questions to paul_mcknight@vexrobotics.com *Lesson 01 - Pupils will familiarise themselves witht the Autodesk Inventor environment and start to build up the first elements of their Tumbler. Pupils will use an engineering workbook to record the steps completed, the tools and parts used, and the issues that arose through out the entire project. *Lesson 02 - Pupils will review their modelling achievements in pairs and share ideas on how to improve one another's modelling approaches and continue to further build the virtual elements of their Tumble. *Lesson 03 - Pupils will discuss targets to complete the build and start to design additions they plan to add to their Tumblers. They will then work to compete the Tumbler Robot build. *Lesson 04 - Pupils will discuss with the the previous learning associated with the Tumbler unit, linked to the sensors used to produce different VEX Tumbler behaviours. They will also make notes on the Tumbler parts and components needed to build the 5 different sensor based Tumblers from the physical project. Engineering notebooks will be wrote up for teachers to sign off.
VEX Robotics EDR Curriculum - Unit 3.2: Laser CuttingQuick View
VEX-PaulVEX-Paul

VEX Robotics EDR Curriculum - Unit 3.2: Laser Cutting

(1)
The project concentrates on the sketch process of new 2D forms, and their translation into 3D using plastic forming techniques. Through sketching there will be a process of modelling and iterative design exploration, leading to the development of a potential final solution that can both perform better towards a specific design challenge, and achieve new structural build options using these unique parts. Once the build is complete, students will need to plan test and evaluate the performance of their robotics solution, including the consideration of; performance towards a challenge goal; performance of the materials in use; performance of the formed parts; tolerance and ease of assembly of formed parts for the product outcome. 1. * Lesson 01 - Introduction to the project and discussion about structural members, pieces and components that make up a typical robotic solution. Pupils will also be Introduced to designing and sketching solutions for the laser cutter. 1. * Lesson 02 - a more detailed look at laser cutting, studying the process, the software, and the considerations for power vs speed. • Pupils observe a demonstration of how to form acrylic components that have been laser cut. Students working in teams form and build a range of parts and assemble their own Clawbot • * Lesson 03 - Creative design task starter. Students design a robotic solution they will fabricate using card before committing to acrylic. Students observe safe practice using cutting matts, and craft tools of that nature to prepare parts to be glued together. Students work again in teams to make parts. Team roles (cutter, former, glue-er, builder, designer, marker) will be needed for success. • * Lesson 04 – Pupils will consider a Clawbot that has been redesigned, focusing on manufacture, and learning that there are more ways to develop an idea beyond form and function. Pupils will then analyse an improved design before redesigning and developing their own. 1. * Lesson 05 – Pupils will Learn about material properties by exploring heating processes and plastics, use a range of tools and techniques to create accurate parts, and Develop a working understanding of how to shape and form plastics for prototyping. • * Lesson 06 – Pupils will build a unique design solution using laser cut VEX parts into a finished robot, carry out testing on the robot solution, comparing to the specification. They will then identify possible improvements to the robot including specific changes to parts.
VEX Robotics EDR Curriculum - Unit 3.1: 3D PrintingQuick View
VEX-PaulVEX-Paul

VEX Robotics EDR Curriculum - Unit 3.1: 3D Printing

(1)
This project encourages students to build upon their in-depth knowledge and experience of working with VEX EDR in unit 1 and unit 2, by integrating a wider range of sketching, computer aided design and prototyping skills. The aim of the project is to develop an outcome not possible in the current platform portfolio of parts, and produce high quality and functionally successful engineered solutions. *Lesson 01 – Pupils will learnt about 3D printing technology focused around the Up! Mini 3D printer. They will explore and study the disruptive potential of 3D printing technology, and discover the potential future opportunities beyond design and engineering. * Lesson 02 – Pupils will learn about a sketching technique that will support communication skills, adapt the designs of others to improve ideas about design, and developed the ability to communicate to others effectively. * Lesson 03 – Pupils will learn how to build a VEX Clawbot using 3D printed parts. Issues associated with micron level tolerance of parts that are 3D printed are explored. * Lesson 04 – Pupils will develop ideas from simple into final parts with a functional focus. They will then discuss the strengths and weaknesses of new component parts. * Lesson 05 – Using a working Clawbot, students modify the build by adding the aesthetic parts and fitting them using the range of tools. These are then tested to see how the different parts perform and evaluate through repeated testing on a part of process. * Lesson 06 - Students conduct an analysis of VEX parts to consider what their function and aesthetic are. Starting from the project brief, Students sketch and develop their ideas moving from designs on paper to CAD (Autodesk Inventor) before committing parts to 3D printing, assembly and testing. At the end of the project, students evaluate their 3D printed parts range, and consider how they could have designed and made better.
VEX Robotics EDR Curriculum - CNC Unit 3.3Quick View
VEX-PaulVEX-Paul

VEX Robotics EDR Curriculum - CNC Unit 3.3

(1)
The project foci is the design, development and adaptation of existing robotics 2D drawing files to support the creation of new parts for new and improved purposes. The initial exploration of 2D design is aimed to develop understanding and CAD skills to support the physical modelling, and the later stages more focused on the development of an entire fabricated robot towards a changed brief. Once built, robotic solutions will need to be programmed to support their new design and potential new function. Through the project, pupils will be able to develop confidence in model making, sketching, CAD and CAM, industrial processes and methods of manufacture, and apply their D&T knowledge and materials experience to developing unique and complex solutions that widen the scope of the VEX EDR world. * Lesson 01 – Pupils will learn about Computer Numerical Control and be able to identify how CNC is used in industry * Lesson 02 – Pupils will Explore CAD and the structure by which CAD packages work, learn about planning CAD to make CAM successful and consistent, and develop knowledge about CIM and the elements that affect modern manufacture. * Lesson 03- Pupils will apply Autodesk Inventor Sheet metal environment tools to a design task and develop a range of specific product outcomes. Pupils will then plan unique components in sheet metal to enhance an existing VEX Clawbot. * Lesson 04 – After applying a series of quality checks on a manufacturing file, pupils will carry out post processing on the fabricated parts suitable for assembly into the VEX system. * Lesson 05 – By the end of this lesson, pupils will have identified a solution, sketched the solution, and produced a CAD file for its fabrication, and produced a part through CNC machining. * Lesson 06 – The class will be introduced to the lesson challenge and pupils will form teams to manufacture an entire VEX Clawbot from CNC made parts. They will need to identify and solved issues relating to forming and post processing, and develop a clear approach for quality checking CNC made products.
VEXcode VR Virtual Robot Block Coding LessonsQuick View
VEX-PaulVEX-Paul

VEXcode VR Virtual Robot Block Coding Lessons

(0)
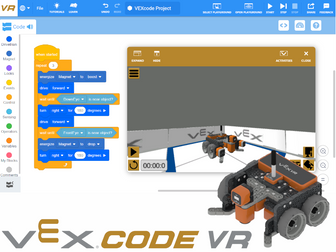
Introduction to Block Coding with VEXcode VR Intended for use with ages 8-12 6 lessons to deliver using the free version of VEXcode VR found at vr.vex.com Each lesson is approximately one hour of content. Each has a detailed PowerPoint for front-of-class and a lesson plan to give you a breakdown of the lesson content, learning outcomes and approximate time to deliver each section. Lesson 1 - Welcome to VEXcode VR Learn the basics of the VEXcode VR software, how commands and parameters work, and start to make the robot move. Lesson 2 - Draw a House Using the VEXcode VR robot pen, create a sequence of commands to make the robot draw a house Lesson 3 - Loops Look at the 4 different types of loops in VEXcode VR and discuss how they differ. Use the repeat loop to carry out repetitive functions in code. Lesson 4 - Disk Mover Introduce the concept of sensors and use these in an algorithm using sequence and iteration. Discuss Boolean sensor values and how these can be incorporated into the code. Lesson 5 - If/Else Selection Introduce the concepts of selection in a computer program (if, else if and else). Review the different selection blocks available in VEXcode VR and create an algorithm that uses iteration and selection. Lesson 6 - Developing an Algorithm Lesson Objective: Develop an algorithm using sequence, selection, iteration and sensors to knock down all the castle buildings and clear them off the Playground. Further content for teaching with VEXcode VR can also be found at education.vex.com/stemlabs/cs including activities and curriculum. VEXcode VR can be used as a standalone tool, or in tandem the physical VEX Robotics robots to deliver a complete STEM curriculum: VEX 123 - Ages 4-8 VEX GO - Ages 8-11 VEX IQ - Ages 11+ VEX EXP - Ages 14+ For more information about teaching with VEXcode VR or with physical VEX robots, contact eusales@vexrobotics.com
VEX Robotics EDR Curriculum - Autonomous Robotics UnitQuick View
VEX-PaulVEX-Paul

VEX Robotics EDR Curriculum - Autonomous Robotics Unit

(0)
This project encourages students to move beyond the VEX Robotics competition and typical classroom practice, and develop working knowledge of industrial, autonomous robotic solutions for the manufacturing sector. Students will ideally have completed the Tumbler Unit 1, Clawbot Unit 2, and Manufacturing Units 3.1 and 3.2 prior to commencing this project, though this is not essential. The ability to fabricate and manufacture custom parts to link with the VEX EDR equipment will lead to more complex and successful outcomes when combined. 1. * Lesson 01 - Introduction to the project and discussion about FANUC robotics, industrial robot applications and robotics in systems. Pupils learn about the elements of a typical robot, including key terminology and language used to describe industrial robotic solutions. * Lesson 02 - Building skills are applied to replicate an existing design * Lesson 03 – Pupils Learn how to operate a static VEX robot using the joystick and developed understanding of control, moving from playing to programming. They will then begin to map out a programme for the control of a static robot. * Lesson 04 – Pupils will develop their working knowledge of programming language for robotic control and adapt a programme to achieve their goals. * Lesson 05 – Pupils will learn about sensors and what sensors do and develop knowledge about how to integrate sensors into a robot to build a sensing robot. * Lesson 06 - exploring the task of designing and sketching robot ideas, pupils will work in a team to develop a final solution and manufacture a final solution suited for testing against a design brief. * Lesson 07 – Pupils work against the clock to explore the team dynamic and developed a final robot, Producing a final solution that achieves a purpose. * Lesson 08 – Pupils will analyse a design brief and challenge and formulate design solutions that will meet the challenge. They will then start to develop initial ideas through sketches. * Lesson 09 - Work initial ideas into an actual design solution and improve design solution by referring regularly to a technical specification. Thye will then go on to build the start of a final solution. * Lesson 10 – Pupils will develop final build into a finished robot solution, programming robot to function and perform. They must ensure robots meet the specification in all technical aspects. * Lesson 11 – pupils will plan and deliver a presentation of your robot and demonstrate robot as a proof of concept * Lesson 12 - Students learn about methods FANUC use to establish a new project brief with a customer/client. Students’ pair up and work to a client and engineer role play task. They must take on the role of either, and through the use of Fanuc documentation, and apply analysis techniques to match client needs to design solutions