Reading for gist- using the second condtionQuick View
lauren1xx

Reading for gist- using the second condtion

(0)
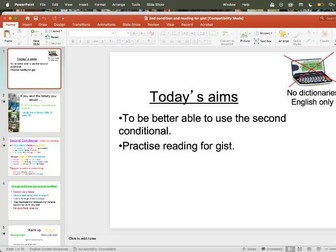
Second Conditional & Reading for Gist This is an English language lesson with two main learning focuses: using the second conditional and developing reading-for-gist skills. The lesson is conducted in English only with no dictionaries. Lesson sequence Second conditional warm-up: Students begin by responding to imaginative questions such as If you won the lottery, you would , encouraging them to produce hypothetical sentences. Grammar focus: Students learn the structure of the second conditional: IF + past simple + WOULD + infinitive, used in the lesson to describe an unlikely future possibility. Students practice examples such as If I studied, I would get good grades and I would move to Milan if I had more money. They are also introduced to using were with all subjects when using be. Controlled practice: Students transform prompts such as Sneeze use a tissue and Have a headache take an aspirin into second conditional sentences. Reading-for-gist introduction: The lesson then moves to reading skills, distinguishing reading for gist from reading for detail. Students learn that reading for gist involves skimming a text quickly to identify its genre and main message, rather than reading every detail. Why gist matters: Students consider how skimming helps them understand the main points quickly and can support performance in tests and exams. Gist practice: Students practice skimming a short news-style text about an expensive wool suit and identifying its main idea. Main reading task: Students work with a text about the common cold and identify which questions/headings relate to the text, such as what a cold is, how we catch colds and how often we get them. The lesson also includes an conditional game as a further practice activity.
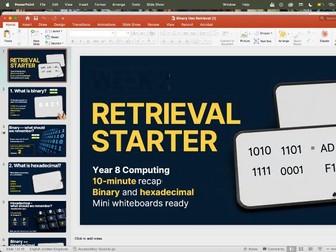
Hexadecimal and binary starter (10 min)Quick View
lauren1xx

Hexadecimal and binary starter (10 min)

(0)
Binary & Hexadecimal Retrieval Starter This is a Year 8 Computing ten minute retrieval starter designed to reactivate students prior knowledge of binary and hexadecimal using mini white boards. The lesson is highly interactive, with students repeatedly think, write, pens down 3-2-1 boards up, allowing the teacher to quickly check whole-class understanding. Lesson sequence Binary recall: Students are asked what binary is and retrieve key facts, including that binary uses only 0 and 1 and that a bit can have a value of 0 or 1. Hexadecimal recall: Students independently write everything they remember about hexadecimal before reviewing the key facts: sixteen symbols, 0 to 9 and A to F, including A = ten and F = fifteen. Binary, hexadecimal: Students practice the relationship between the two systems, learning that 4 binary digits represent 1 hexadecimal digit. They use their mini white boards to complete a conversion challenge. True or False retrieval: Students answer ten statements on their mini white boards covering binary, hexadecimal, bits, bytes and nibbles. Self-marking: Students check their answers and award themselves one point for each correct response. Final challenge: Students convert numbers from binary to hexadecimal, arriving at D 1. Final recap: The starter finishes by reinforcing three key facts: binary uses 0 and 1, hexadecimal uses 0 to 9 and A to F, and one hexadecimal digit represents four binary bits. Overall This is a fast-paced, whole-class retrieval activity rather than a traditional teacher-led lesson. It uses mini white boards, short questions, visible answers, self-marking and a final challenge to check and strengthen students existing knowledge before moving on to new learning.
How Data Packets NavigateQuick View
lauren1xx

How Data Packets Navigate

(0)
This lesson introduces students to data packets and routing, explaining how data travels across a network from a sender to its destination. The lesson begins with a starter discussion asking students how a message knows where to go, encouraging them to think about the pathways and decisions involved in network communication. Students then learn that: Data is broken into small packets before being transmitted across a network. Each packet contains a part of the original message. Packets contain a destination address so they can be delivered to the correct endpoint. Routing is the process of determining the best path for packets to travel when multiple routes are available. Routers examine incoming data and determine where packets should be sent next. Routing algorithms are used to determine appropriate routes, including shortest-path routing. Dynamic routing can change routes according to current network conditions, helping to manage congestion and maintain efficient transmission. Students compare static routing, where predetermined paths are used, with dynamic routing, where paths can change according to network conditions. The lesson includes a check-for-understanding section where students consider why packets from the same message might take different routes and what the main role of a router is. It finishes with a recap of the three main concepts: data packets, routers and routing algorithms, reinforcing how they work together to allow information to travel efficiently and reliably across networks.
KS3 Scratch lesson ppt and handoutQuick View
lauren1xx

KS3 Scratch lesson ppt and handout

(0)
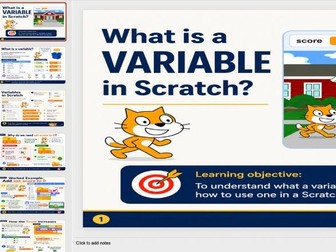
This Key Stage 3 Scratch programming lesson introduces students to variables and how they can be used to store and change values in a Scratch program. Students work with a quiz game where a variable is used to store the player’s score. They explore how variables can be set, changed and used alongside if/else statements. Lesson sequence Introduction to variables: Students learn that a variable is like a box that has a name and stores a value. The value can change while the program runs. Setting a variable: Students learn to use set score to 0 when the program starts so that each game begins with a fresh score. Changing a variable: Students use change score by 1 when a player gives the correct answer, allowing the score to increase. Independent task: Students remix a Scratch quiz project. Question 1 is provided as a completed example, while students create Question 2 and Question 3 using the same structure. Procedures or organization: Students use define blocks to organize each question and then call Question 1 Question 2 Question 3 in sequence when the program starts. Plenary and exit ticket: Students review the purpose of variables and answer questions about set, change, and how the score is updated. Overall The lesson moves from understanding what a variable is, seeing it used in a worked example, modifying an existing Scratch program, creating their own quiz questions, checking their understanding. The main learning focus is on using variables, set and change blocks, if/else statements and define blocks to create a functional Scratch quiz.
Introduction to programmingQuick View
lauren1xx

Introduction to programming

(0)
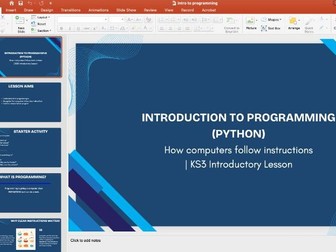
This Key Stage 3 introductory lesson teaches students that computers follow precise instructions and introduces the basics of Python. Starter: Students act as a human computer, following precise instructions and comparing them with a vague instruction. Programming: Students learn that programming means giving a computer clear instructions. Python: Introduced as a programming language used to create programs, games and applications. print command: Students learn how to display text using print(), including the use of brackets and quotation marks. Syntax: Students learn that programming has strict rules and that small errors can stop code working. Activity: Students identify correct and incorrect Python code. Plenary: True/False questions check understanding of programming, syntax, strings, capitals and code order. Key takeaway: Computers do not guess; they execute instructions step by step and exactly as written.
Level 4 BinaryQuick View
lauren1xx

Level 4 Binary

(0)
Topic: L4 – Binary Addition Subject: Computer Systems and Networks The lesson begins by revisiting how number systems work, then builds students towards being able to perform binary addition. Learning objectives By the end of the lesson, students should be able to: Add two binary numbers, each less than 7 bits. Multiply a binary number by 2. Identify whether a binary number is odd or even. Lesson sequence Starter / retrieval The lesson begins with a starter before moving into the core content. Decimal/denary recap Students revisit the denary number system and place value. For example, 583 = 500 + 80 + 3, reinforcing the idea that each place is worth ten times the previous place. Why computers use binary The lesson then connects binary to computer hardware: electronic circuits and switches have two states — On and Off, represented by 1 and 0. Binary representation Students explore how binary place values work: 1, 2, 4, 8, 16, 32, 64, 128 They also investigate how increasing the number of switches/bits increases the number of possible combinations, from 2 combinations with one switch to 256 with eight. Binary ↔ denary conversion Students practise converting: Binary → denary Denary → binary For example, the lesson demonstrates 1101 = 13 and later converts 28 into binary. Students then complete Worksheet 4.1, with separate challenges for the two conversion directions. Odd and even numbers The lesson introduces a useful binary pattern: the right-hand bit determines whether the number is odd or even. Ends in 1 → odd Ends in 0 → even Students then identify whether several binary numbers are odd or even. Multiplying binary by 2 Students discover that adding a zero to the right of a binary number doubles its value: 1011 = 11 10110 = 22 They then try the same with another example. Denary addition recap Before binary addition, the lesson briefly revisits the familiar process of decimal addition, including carrying. Binary addition This is the main new learning. Students are introduced to the five binary addition rules: 0 + 0 = 0 0 + 1 = 1 1 + 0 = 1 1 + 1 = 0, carry 1 1 + 1 + 1 = 1, carry 1 Students then apply these rules to add binary numbers, working right to left and managing the carry bit. Independent practice Students complete Worksheet 4.2, practising binary/decimal conversions and the arithmetic skills from the lesson. Plenary / self-assessment The lesson finishes by asking students to assess whether they can: Add two binary numbers. Multiply binary by 2. Identify odd/even binary numbers. Identify and explain the key vocabulary.