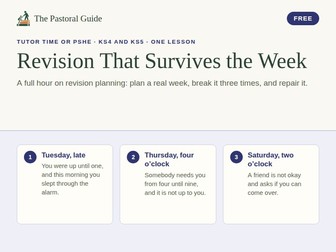
Revision planning lesson: a revision timetable that survives the week, KS4 and KS5Quick View
thepastoralguide

Revision planning lesson: a revision timetable that survives the week, KS4 and KS5

(0)
A complete one hour tutor time lesson on revision planning, for the term before mocks or the run-up to the real exams. It is free, and the slides, the week sheet and the timings are all here. Most schools hand out a blank revision timetable, and most of those do not last the week. This lesson is about the week that actually happens rather than the one on the grid: each student plans seven real days, then the plan gets broken three times and they repair it. What happens in the hour It opens with two minutes of private writing: the last time you made a revision timetable, how long did it last, and what happened to it? The answers are the same in every room, and the lesson is built on them. Then four rules for a plan that lasts. Sessions are small. Sessions are named, so the plan says what you will do rather than which subject. One slot is left empty on purpose. And you plan the next week, not the whole term. One Monday is planned twice on the board, once the usual way and once by the rules, and the difference is obvious. Then each student plans the seven days ahead on the sheet, in pencil. And then the week goes wrong. Tuesday, late: you were up until one and slept through the alarm. Thursday, four o’clock: somebody needs you until nine, and it is not up to you. Saturday: a friend is not okay and asks if you can come over. After each one, two minutes to repair the plan rather than throw it away. At the end the room looks at which sessions survived all three, and they are the small, named ones. Pairs then check a plan that is not theirs against the four rules, there is one question to argue about, and the exit ticket is what they will do on Monday morning. The last slide is a two-minute Monday check-in to bring back in registration for the weeks that follow, for as long as it is useful. What you get Seventeen PowerPoint slides: the starter, the four rules, the modelled Monday, the planning slide, the three interruptions, the look back, the swap, the discussion, the exit ticket, and the Monday check-in. A three page printable PDF pack: the hour minute by minute against the slide numbers, the week sheet to print one per student, and the Monday check-in cards. Before you run it Some students will be planning around a home that does not give them an evening, and some will not have anywhere quiet to work. The sheet is theirs and is not collected, the slide that says so is in the deck, and the spare slot exists so that a plan can lose an evening without failing. Written for Year 10 to Year 13 by a secondary form tutor. More free tutor time lessons are in this shop.
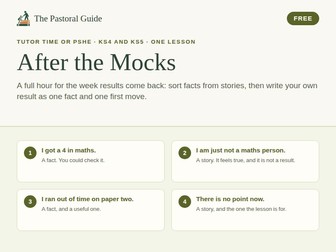
After the mocks: a tutor time lesson for the week mock results come back, KS4 and KS5Quick View
thepastoralguide

After the mocks: a tutor time lesson for the week mock results come back, KS4 and KS5

(0)
A complete one hour tutor time lesson for the week after mock results, and it works after any set of results. It is free, and the slides, the cards, the sheet and the timings are all here. A result says three things: what was tested, what you did on it, and nothing at all about next time. The story a student starts telling themselves adds a fourth thing, what the result says about them, forever. This lesson separates the two, and then has each student write their own result as one line of fact and one first move. What happens in the hour It opens with a sort. Eight things students say in the week after results go on the tables, one set of cards per table: “I got a 4 in maths”, “I am just not a maths person”, “I ran out of time on paper two”, “There is no point now”. The table sorts them into facts and stories before anything is taught, and two of the cards are written to start an argument. The disagreements go on the board. Then the teaching: the three things a result says, the fourth thing a story adds, and one made-up result shown both ways. One more is done together, out loud, so the move has been seen twice before anybody does it alone. Then their own result, on the sheet: the result, what it tested, where the marks went if they know, one line of fact and one first move that takes less than an hour. Pairs check each other’s fact line for a story in disguise. There are two questions to discuss, a slide on what the week after results is actually for, and a private exit slip that asks what they would say to a friend with their result rather than what they think of themselves. What you get Fourteen PowerPoint slides, each labelled with the part of the lesson it belongs to: the sort, the two piles, the three things and the fourth, the modelled result, the one done together, their own, the swap, the discussion, the week after, and the exit slip. A three page printable PDF pack: the hour minute by minute against the slide numbers, the eight cards to cut once, and the sheet to print one per student. Before you run it A result can be tangled up with what is happening at home, and for a few students a bad mock lands on top of something much bigger. Nothing on the sheet is collected or read out, and the deck says so. Students need their own result in front of them, or a rough memory of it. Written for Year 10 to Year 13 by a secondary form tutor. More free tutor time lessons are in this shop.
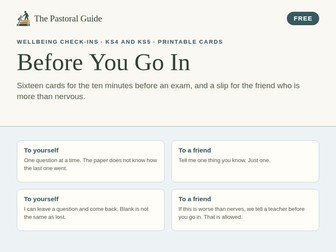
Exam stress cards: what to say to yourself and to a friend before an exam, KS4 and KS5Quick View
thepastoralguide

Exam stress cards: what to say to yourself and to a friend before an exam, KS4 and KS5

(0)
A printable set of small cards for the ten minutes before an exam, free to download. Eight things to say to yourself, eight things to say to a friend who is falling apart in the corridor, and a slip for the friend who is more than nervous and needs an adult. Fifteen minutes of tutor time to read them through, and then the cards live in a pocket or a pencil case. How it works In the week before the first exam, read the two sets of cards through together. Each student picks one card for themselves and one they would want a friend to say to them, and says why. Everyone gets both card pages uncut and cuts out the two they chose. They go in a pocket, a pencil case or a planner. Then show the slip, and say what happens when it is used. It is for the friend who is more than nervous. It goes to any member of staff, before the exam or during it, including whoever is on the door of the hall, and the guide says what to do when one arrives. Say out loud that using it is allowed. Then nothing, until the corridor. The cards do their work in the ten minutes before a paper, when nobody is teaching. A student who has read a sentence once in a form room is more likely to say it to a friend outside a hall. Why the cards are written the way they are They are instructions and true statements, not affirmations, because a nervous person cannot use a compliment. “One question at a time. The paper does not know how the last one went.” “Tell me one thing you know. Just one.” Each one is short enough to say in a corridor. What you get A four page printable PDF: a one page guide for the teacher, eight cards to say to yourself, eight cards to say to a friend, and the slips, four to a sheet. Print the two card pages for every student and keep a few spare slips in a drawer through the exam weeks. Before you use it Exam mornings are when things surface. The slip exists so that a student never has to decide alone whether a friend is fine. When one reaches you, find the student before the paper starts if you can, and pass anything beyond nerves to your safeguarding lead the same day. Written for Year 10 to Year 13 by a secondary form tutor. More free tutor time and wellbeing check-in resources are in this shop.
Bystander to upstander: a full anti-bullying lesson for KS3 and KS4Quick View
thepastoralguide

Bystander to upstander: a full anti-bullying lesson for KS3 and KS4

(0)
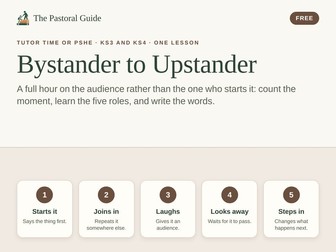
A complete one hour anti-bullying lesson about the audience rather than the person who starts it, written for tutor time and equally at home in a PSHE slot. It is free, and the timings, the answer key and everything to print are in the pack. Behind-the-back laughing needs an audience, and most of that audience does not think it is involved. This lesson is about getting students to count themselves in, and then giving them the words to do something about it. What happens in the hour It opens with a count. Six lines go up on the board: somebody answers a question wrong, somebody repeats it at break, three people laugh, and by Friday the student it was about has stopped answering questions in that lesson. In pairs, students list everybody who was part of it. Most forms count two. It is eight. Then the five roles a group splits into. One starts it, usually once. One joins in, or repeats it somewhere else later. One laughs, which is the biggest group and the one nobody counts. One looks away and waits for it to pass. One steps in and changes what happens next, usually in a few words. The five roles come from a study of 573 students and have been in use since 1996. Then the evidence, taken in the other order. Before the numbers arrive, pairs predict them: in 306 moments recorded on a playground, how often did another child step in, and how often did it stop within ten seconds when they did? The answers are 19 per cent and 57 per cent, and both are worth arguing about. Then the actual words. Three ways out, one of them silent. One is modelled, one is done together out loud, and then twelve minutes in pairs writing what they would really say to a moment on a card. Sheets move two tables along and get marked against three questions, the first of which is whether anybody could say it out loud in this school. What you get Eighteen PowerPoint slides: the moment to count, the five roles, the study to predict, the three ways out, the marking round and the exit ticket. A four page printable PDF pack: the hour with timings set against the slides, the answer key and the three studies, the sheet students write on, and eight moment cards. The names in the script are made up, so change any that match somebody in your year group. The three studies are named in full in the pack: Salmivalli and others (1996) on the roles, Hawkins, Pepler and Craig (2001) on the playground, and a 2025 meta-analysis of what actually works. Before you run it This one can land close to something already happening in your form. Do not use a real incident or a real name, and do not run it the day after one, because the student it happened to will know. Nothing students write is collected or read out, and the deck says so before anybody writes anything. Written by The Pastoral Guide, a secondary form tutor, for Year 7 to Year 11. More free tutor time lessons are in this shop.
Wellbeing check in questions: 24 printable conversation starter cardsQuick View
thepastoralguide

Wellbeing check in questions: 24 printable conversation starter cards

(0)
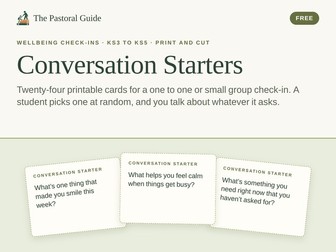
Twenty-four printable cards for a one to one or small group wellbeing check-in, free to download. A student picks a card at random and you talk about whatever it asks. There is no script beyond that, and no answer is wrong. How it works Cut the deck apart once and keep it wherever your check-ins tend to happen: a desk drawer, a folder, a coat pocket. When you sit down with a student, they pull a card and read it aloud, or hand it to you. Let the conversation go wherever the prompt takes it. There is no need to rush on, and if a card does not fit that day they can skip it and pick another. One card is enough for a quick check-in. Work through several for a longer conversation. The same set lasts all year, and you can add cards of your own over time. Why it is worth having The hard part of a check-in is usually the first thirty seconds, when a student who has been sent to see you is deciding how much to say. Handing them a card takes the choice of subject away from both of you. Over a term it is how a student gets used to talking to you, so that when something does need saying they already know how the conversation goes. What you get A printable PDF with a one page guide for the teacher and the full set of twenty-four conversation starter cards, twelve to a page. The prompts range from the easy (“What is one thing that made you smile this week?”) to the ones that open a door (“What is something you need right now that you have not asked for?”). What it is not It is not a screening tool and it does not measure anything. Nothing a student says is recorded on the card or anywhere else. It suits Year 7 to Year 13 and it is meant for the person who already has the pastoral conversation in their week: a form tutor, a head of year, or anybody running check-ins. Written by The Pastoral Guide, a secondary form tutor. More free wellbeing check-in printables are in this shop.
Praise postcards: free printable praise postcards for secondaryQuick View
thepastoralguide

Praise postcards: free printable praise postcards for secondary

(0)
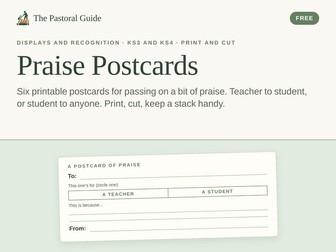
A printable postcard for passing on a bit of praise, free to download and print. A teacher can give one to a student, or a student can send one to a teacher or to another student. You circle who it is for. How it works Print a couple of sheets and cut them apart. Keep the stack somewhere easy to reach: a desk, a tray, a form room drawer. When somebody has earned one, write who it is for, circle whether that is a teacher or a student, write the praise, sign it, and either hand it over or add it to a praise wall or a form room display. Top the stack up when it runs low. That is all the preparation there is. The reason it is worth doing is that it gets people saying thank you out loud, in a building where most praise is either a tick or an email home. Praise counts for more when it is not rare, so the stack is meant to be used, not saved for the big moments. What you get A printable PDF with a one page guide for the teacher and six praise postcards, printed three to a page and ready to cut apart. Photocopy for as many as you need. Where it fits It suits Year 7 to Year 11 best, it needs no slot in the timetable, and it works as well for a head of year keeping a stack in a drawer as it does for a form tutor. It also sits alongside a form room display board, since a wall of postcards fills one quickly. Written by The Pastoral Guide, a secondary form tutor. More free form time and recognition printables are in this shop.
Anti-Bullying Week: assembly and five themed days, KS3 and KS4Quick View
thepastoralguide

Anti-Bullying Week: assembly and five themed days, KS3 and KS4

(0)
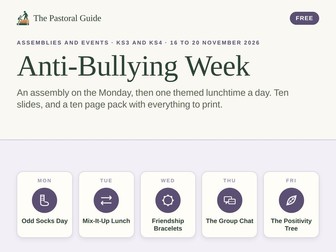
Anti-Bullying Week 2026 runs from Monday 16 to Friday 20 November, and this is a whole week for a secondary school: an assembly to launch it on the Monday, then one themed activity at lunchtime on each of the four days that follow. It is free, and everything you need to print is in the pack. The Anti-Bullying Alliance’s theme for 2026 is Break the Silence. The week set out here runs alongside that rather than being built to it, and underneath all five days it is a week about noticing who is on their own. The week Monday is Odd Socks Day: odd socks worn with uniform, all day, whole school, launched by the assembly. Tuesday is a Mix-It-Up Lunch, with a topic card on every table so that sitting somewhere new is easier than it sounds. Wednesday is friendship bracelets, made at lunchtime, two each, one kept and one given away. Thursday puts a group chat on the wall for students to annotate where it went wrong. Friday is a positivity tree, where students write something good about somebody else and hang it up. Each day stands on its own. If one falls through, the rest of the week still works. What running it involves The assembly is ten slides: what bullying actually looks like, a slide for each day of the week, and one on how to report something. You fill in your own rooms, times and reporting route before you show it. There is one shop and one print run. The only things to buy are embroidery thread, beads and string. The leaves, the table topic cards, the group chat sheets and the wall prompts all print from the pack. Odd Socks Day needs nothing beyond a heads-up to form tutors, and each of the other four days needs one member of staff and about forty minutes. What you get A ten slide PowerPoint assembly, and a ten page printable PDF pack: a page of guidance for each part of the week, a shopping list, the bracelet method, the leaves, the table topic cards, the three sheet group chat and the four prompts to pin around it. Before you run it A week like this brings things to the surface, and that is partly what it is for. Before Monday, make sure everyone running a lunchtime knows who to pass a disclosure on to. Written by The Pastoral Guide, a secondary form tutor, for Year 7 to Year 11, and it works with sixth form too. More free form time, tutor time and assembly resources are in this shop.
Banter or bullying? A full anti-bullying lesson for KS3 and KS4Quick View
thepastoralguide

Banter or bullying? A full anti-bullying lesson for KS3 and KS4

(0)
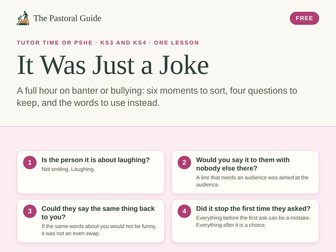
A complete one hour lesson on the difference between banter and bullying, written for tutor time and equally at home in a PSHE slot. It is free, and the timings, the answer key and everything to print are in the pack. “It was just a joke” is what gets said when a joke has landed badly, and it usually closes the conversation down rather than sorting it out. This lesson takes that sentence apart and gives students something better to say instead. What happens in the hour It opens with a sorting task. Six short moments go on the board and pairs put each one under joke, not a joke, or cannot tell. Nobody is told what to look for. Then the six turn out to be three pairs. Inside each pair the words barely change. What changes is who was laughing, who the nickname belonged to, and whether it stopped when somebody asked. Everything the form sorted them by was somewhere other than the words. Out of that come four questions for telling one from the other. Is the person it is about laughing, not smiling but laughing. Would you say it to them with nobody else there, because a line that needs an audience was aimed at the audience. Could they say the same thing back to you. Did it stop the first time they asked, because everything before the first ask can be a mistake and everything after it is a choice. A joke passes all four. The questions come out of the starter rather than being handed down at the start. Then the sentence itself, which says two things at once: I did not mean to hurt you, and now stop talking about it. The first half is usually true and would be an apology on its own. Students write what they would really say instead, once for the person who said it and once for the person it was about, and the sheets are marked by somebody else against three questions. What you get Eighteen PowerPoint slides: the six moments to sort, the three pairs, the four questions, what the sentence is doing, the words to use instead, the marking round and the exit ticket. A five page printable PDF pack: the hour with timings set against the slides, the answer key in two parts, the sheet students write on, and eight moment cards. Nothing on the cards names anybody, so they can go out as they are. The research behind the lesson is in the pack too: a 2020 study of what secondary students say is always off limits, and the Anti-Bullying Alliance’s Banter or Bullying toolkit. Before you run it This one can sit close to something already going on in your form. Do not use a real incident or a real name, and do not run it the day after one. One slide lists the subjects students in the research put over the line, and one of them is somebody who has died, so the guide says to check who that would land on first. Nothing students write is collected or read out, and the deck says so before anybody writes anything. Written by The Pastoral Guide, a secondary form tutor, for Year 7 to Year 11, and it works in sixth form. More free lessons are in this shop.