Teaching Art is a feast into a of colour, line, texture, space and shape. By encouraging a visual exploration in my learning I love developing a creative approach to learning in the classroom. By encouraging different techniques and an understanding of art I hope to help students appreciate visual learning more. I hope you enjoy my uploads and can use them. Please contact me if you require any further information.
Teaching Art is a feast into a of colour, line, texture, space and shape. By encouraging a visual exploration in my learning I love developing a creative approach to learning in the classroom. By encouraging different techniques and an understanding of art I hope to help students appreciate visual learning more. I hope you enjoy my uploads and can use them. Please contact me if you require any further information.
This resource is helpful at GCSE and A-level to teach how to apply acrylic paint with a scraper, a ruler or a card to drag colours and to overlap layers of colours.
The resource has examples of Viera da Silva’s work to give to students. Students will need cardboard and a bank card and use this to apply the paint.
Students need to practise copying her work with only a bank card to create the marks.
Students need to cut the card in various sizes
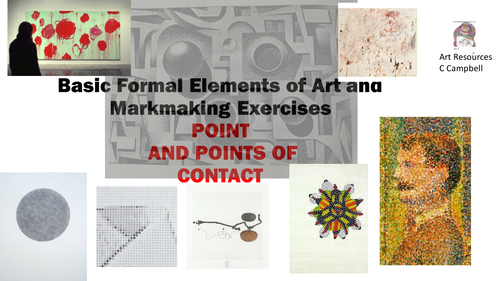
This is a good powerpoint for basic foundation course on different elements of art - starting with Point - it gives you a number of exercises to explore this element as a creative element.
Lots of exercises and different artists.
An excellent starting point for A-level art looking at the basics of a mark and how this effects the negative area.
This is a step by step drawing of a cupcake - showing how to start with basic shapes and then adding in the detail and the shading. This is part of the modern movements project where students make a cake stand with various cup cakes in different art styles linked to modern movements: Expressionism, Neo-Impressionism, Fauvism, Realism, Surrealism.
It also has some slides showing how to do some mark-making exercises to build up students ability to control pencil skills and to capture detail.
Students can also draw from a picture of a cup-cake or preferably have a real cup-cake in front of them to draw from.
Students can also use the grid method to draw a cupcake and there is a picture of this technique to help.
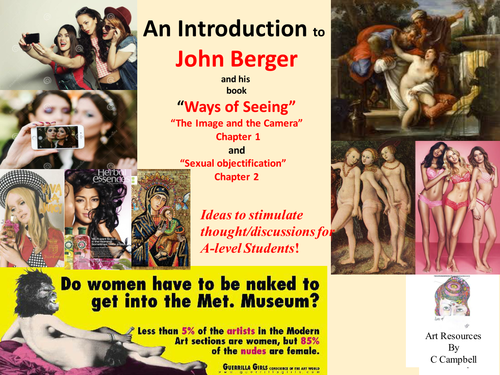
Looking at briefly two chapters of the famous John Berger book ’ Ways of Seeing’ It is difficult to summarise a book of such a wealth of knowledge and such a clever way of phrasing ideas.
The slide presentation gives one a sketch of two chapters. Chapter one which discusses the image versus the photo, seeing versus words and there are a few quotes from John Berger but also the link to the You tube clips.
This is a good A-level presentation and then to get the students to listen to the first two chapters on video clip.
Students need to question how an image has lost its meaning through the advent of the camera and begin to draw a comparison of images before the camera and after the camera.
Students should also look at how the way we have reproduced the female form through the ages from Antiquity to the 21st Century and think about the meaning of what it is to be nude and what it is to be naked. John Berger has a lot of ideas on this and there are lots of phrases from his book discussing this concept and showing some examples of this in some major artworks.
One can never make justice of this incredible book but the slide show does allow for discussion in the class on important concepts and understandings we have of images in our time.
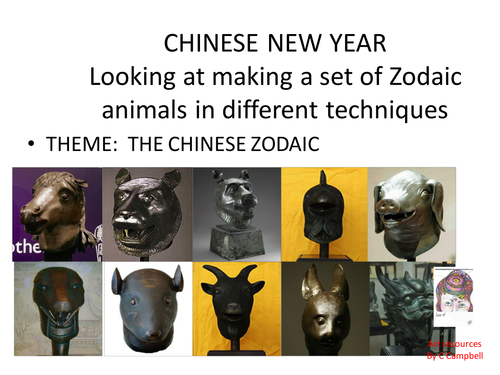
Used in a house competition where each House makes a different set of animals for Chinese New year in a different technique.
Animals in paper art, photoghrapy manipulation of animals, Painting animals, Plastic animals and paper mache artists.
Students work in groups and each group makes a different way of making a set of animals.
This is a fun activity for KS 3 Art project or an after school club.
Tasks to develop drawing skills and giving examples and exercises to develop line qualities in drawings.
Looking at various types of lines and ways of drawing with artists examples this is a great project for year 12/13 -AS and A-level class to develop confidence and skills in sketchbooks.
A good way to build skills in art. Gives a variety of tasks and inspiration with a wealth of different lines to use.
Using different types of lines to draw with like, contour lines, pattern lines, expressive lines, structural and modelling lines, diagrammatic lines planning and plotting lines and with examples to support the learning.
There are lots of little exercises to develop confidence in drawing with lines.
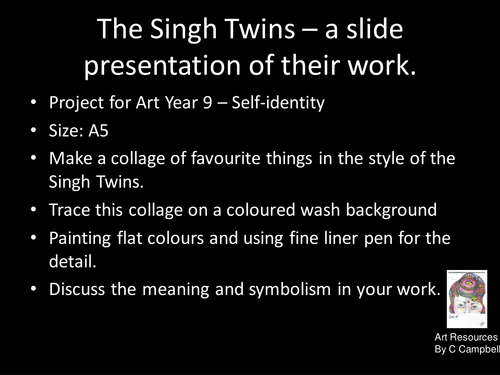
Use the Singh Twins to inspire a collage on Self-identity Year 9 project at KS3. Students make a collage of their own photographs and favourite things. Transfer this and trace to a coloured washed background and paint in shapes and add in the fine pen line work to give detail.
This is an examples of photographs of a sketchbook of an A* Art coursework project for an A2 student, who looked at experimental surfaces and textures to develop an exciting unique outcome.
This was based on her nature photographs and showed a number of different layering techniques.
The final piece was a window display made up of glue skins with layers and textures.
There are references to artists she used as well.
German Art Historian, Heinrich Wolfflin in his “PRINCIPLES OF ART” (1915) isolated five opposing factors which he defined as the difference between
High Renaissance and the Baroque style. This can further relate to the contrasts in MODERN ART MOVEMENTS
There are the 5 main ways of interpreting forms with examples of the work of Heinrich Wolfflin that is:
1. painterly, linear,
2. closed, open,
3. planes and recession,
4. multiplicity, unity,
5. clearness and unclearness.
Wolfflin supports a theory on ways of analysing a painting and examples of style which he formulated between the Renaissance and Baroque style and this gives a good interpretation of the differences in ways of depicting a subject.
In the slide presentation examples are chosen to show the differences in style and hopefully students begin to understand the terminology used and begin to look at the ways different works are composed.
The styles of Wolfflin also link to modern art movements like for example, painterly characterizes the work of Pierre Bonnard, Francis Bacon, Paul Gauguin, Vincent Van Gogh, Rembrandt or Renoir.
Linear characterizes the work of Vermeer or Ingres.
The Impressionists and the Abstract Expressionists tended strongly to be "painterly”, while movements such as Pop Art or photo-realism emphasize flatness and could be referred to more as linear.
This also helps A-level students find their particular strengths and to make them reflect on what particular style they enjoy doing in their own work and gives them an excellent sense of vocabulary to use when analysing artworks and gives them an understanding of using art vocabulary when critically analysing their own and artist’s work.
Students after reviewing the following slides on Wolfflin’s theory and discussing what the differences are in style begin to formulate their own essay on style using 2 artworks of your choice.
TASK: Write an essay on two different artworks and analyse the composition and structure of the artwork in relation to the theories of style of Wolfflin. Begin to not only discuss the visual appearance of the subjects but try to relate this to the influences and background of the particular artists you choose.
This is a project where students are asked to choose an artist to study their style.
Student’s question and develop an understanding of What is a style?
Outcome of this project is that students in year 7 do their own portrait interpretation using the artists and create a mixed media collage based on the selected artist.
There is an exploration on using a variety of media.
Students develop their own skills exploring how to make their own portrait in the style of the artist.
Students use a photocopy of a photograph of themselves to work from.
There is an emphasis on experimentation and students can bring in found textures to collage.
Students use the four artists to make a copy of the four artists styles in a grid on a page: Hundertwasser, Klimt, Ofili and Van Gogh.
TASK 1
The first part of the project is the Artist Research in 4 grids. One for each artist.
Students in the grid discuss the characteristics of each artist’s use of line, colour, shape and texture. There is an individual slide on each artist which highlights with close up pictures showing the markmaking of each artist.
Teacher to go through each slide of each artist and copy the pictures as an example for students to work from.
Students write out the name in each gird, how each artist has a different way of using their marks and then in the grid copies a detail of the artist’s work. This is completed in pencil crayons. Students can also use an object and interpret this in styles - there is an example
Students also brainstorm words to describe the artist. Students also describes the use of elements in each work. Students also discuss the main characteristics of the artist and how they have used their line, colour, shape, texture and how the artist has composed the picture (that is, put it together).
This should take 2 lessons - with students completing the work for homework
TASK 2
Once students have analysed this they can go on to make their own portrait by choosing one of the artists. There are lots of examples of students work in this powerpoint to give examples of how to go about this project. Students to be given a photocopy picture of themselves to work from
This should take 3 lessons in class.
Objectives:
Use of found textures, collage materials and paint to interpret a style looking at the way the student experimented with the use of materials to create the style
Explore media creatively when interpreting artist.
Develop vocabulary and to understand the different ways of using lines, shapes and colours and students begin to analyse the artworks critically describing each work.
To begin to understand that each artist has their own way of interpreting their subject and each person has the own way of making their own style
To analyse and interpret four different artist’s styles and begin to make a personal response to one of these artists.
To complete a self- portrait in the style of an artist.
This is a slide of lots of different images of pictures of portraits and figures.
The next slide is of the vocabulary list and words to match with the pictures.
Print the pictures out on a sheet of A3 and get students to match the visual and words.
This is for any age group and relates to a topic on portraiture.
This is a short visual display of how perspective developed from the early Medieval paintings through the key artists in the Renaissance: Giotto, Masaccio, Brunelleschi, Leonardo and then the Dutch artists and then to Cubism.
It shows you how artists have developed a window on a flat space through first of all basic means of overlapping, placement, symmetry and story telling and how this changed with Giotto and Masaccio (use of light and dark shading) and how Brunelleschi brought the grid and camera obscura to develop a window to the world in his paintings.
It further looks at Leonardo’s example and how he developed this linear perspective but then continues with the development of chair-scuro (light to dark shading) and their oil paint blending to continue developing the illusion of reality on a flat surface in their Still life paintings.
The presentation ends with how this has now returned to a flat surface and the surface been treated as a wall again with the work of Cezanne and his brushwork painting and underpainting to develop an illusion of space.
Cubism and its multiple viewpoints show how Art has now returned to a wall and Braque and Picasso’s work show how they have now fractured space and how the importance of creating an illusion of space on a 2D surface was not a priority but instead it was the overall meaning and idea that is important.
These are lists of words and pictures to match. There is also a definition, an explanation of the pictures.
Use this in the classroom in a Medieval Fantastic creature / Bestiary project where you get students to research the images of their own - or use the images provided with the lists to play a game in the classroom.
The powerpoint first of all gives you some techniques to use with paper and students to make a sample board of the techniques.
Homework task: Zentangle …see powerpoint example
Students then go on to draw out an insect and there are symmetry templates for you to use to develop insects.
There are also lots of different resources and pictures of insects to use.
Further task is then to build the paper craft techniques on the pen drawing and to make your relief paper insect. There are examples of different paper techniques and samples to develop.
**Learning Objectives **
Using the topic given insects/birds the aim is to develop their paper art skills and to begin to make an insect. Also, to use skill of symmetry and practise drawing skills and to build a 2D relief insect using paper creatively.
• To learn how to do various paper art techniques and develop ability to manipulate paper.
• To explore a number of different paper craft activities, there are slide examples of techniques.
coiling paper
folding paper
spiraling paper
layering paper
scoring paper
embossing paper
twisting paper
rolling paper
curling paper.
• To EXPLAIN HOW TO carefully draw out insects using the symmetry insects as a guideline.
• To cut out the shapes of insect drawing carefully
• To explore paper techniques.
**Resources **
Large square of re-cycled paper to paste the paper sample techniques on
Glue – pritt stick and pots of glue
Pencils, Scissors
Magazine paper to use to make insects, Pens to draw with
Tracing paper to help with symmetry drawing
**ACTIVITY OBJECTIVES **
To make a sample board of different effects one can achieve when using paper as an art form.
To develop a range of skills to use when working with paper artists and craftsman
To learn to coil, scratch, spiral, fold, bend, cut and lift, twist, emboss, layer, cut, roll and manipulate paper
To learn about different paper artists and craftsmen who work with paper as an art form.
To learn to use paper and to craft various shapes and folds
To learn to build a paper insect using the paper craft techniques, that is, to fold, score, layer, cut, emboss and coil a paper insect
To do homework task: Zentangle insect.
Examples of artists on the Powerpoint to help you to build a 3D paper sculpture with techniques
Also various templates to help you to draw an insect - especially to develop your ability to use symmetry.
This is a source to show students various art styles and examples of artists who do interesting portraits.
It starts with Frida Kahlo and then goes through all the important portrait artists like Rembrandt, Frans Hals, Van Gogh, Picasso and then takes through a number of other artists with interesting styles, Hundertwasser, Gary Hume, Chila Burman, Sonya Boyce, Leger, Picabia, Dali and much more.
To be used as presentation to introduce students to artists who paint portraits in different styles.
Could be printed out as laminated sheets for students to see different portraits.
Firstly consolidating watercolour skills in this project the powerpoint then goes to look at the artist called Hundertwasser. Looking in depth at Hundertwasser, developing an Artist Study presentation after going to the computer room to find information on this artist and to analyse one picture of his work.
Students are then asked to on four separate sheets to draw out the key symbols and elements in Hundertwasser’s work. .
Students are then given pictures of buildings and asked to continue to apply his style and to make some drawings inspired by his work.
Examples of all these are given with student examples.
This project then further developed into making a clay tile after formulating an orignal own interpretation of Hundertwasser. There are plenty of student examples for you to look at.
I have also added further extension tasks on Hundertwasser and some further interesting facts about his work.
OBJECTIVES
To develop an understanding of the work of Hundertwasser by studying the elements from Hundertwasser’s work.
To copy some of Hundertwasser’s symbols with your pencil.
To draw out Hundertwasser’s Onion domes, Lollipop trees, Faces and Spirals.
To draw out a large picture of Lollipop trees of Hundertwasser and to use colour on this
To use pictures of buildings and then to imaginatively interpret one’s own version of Hundertwasser using the research ideas completed into his use of symbols
Students make up their own design of Hundertwasser in pencil and then in colour.
To make a clay tile based on the design steps above- examples of student outcomes are given.
Task 1 ‘Key Elements in the Art of Hundertwasser’
Copy out the picture given on slide 3 and label the key elements Hundertwasser uses in his work. You may use any materials you have to do this. It can be in colour or black and white with your pencil. Do this carefully.
Examples of Cubism showing the close up detail of markmaking and analysis in the works of the Cubists. By developing their painting into textural surfaces with sharp lines to mimic the Cubist analytical works.
There are examples of Cubist works with reference to mark-making in the cubist shapes and using tones. Adding scraping paint with combs, and making paint textural marks to create a variety of mark-making effects.
This powerpoint links with Cubism No.1 Cubism No 2. and Cubism No 3 and No 5.
This is a powerpoint which gives tasks to interpret the style of Hundertwasser.
There are worksheets and information on the artist.
This is part of a project where students design a tile shape in colour using a building phito as an inspiration and stylise this into their own design.
Students then turn this into a clay tile outcome.
This is part of a set of HUNDERTWASSER POWERPOINTS.
In this powerpoint the students use their design they made for their tiles and make a tile in clay in the style of Hundertwasser.
In this powerpoint there are examples of how to roll and make the tile with key clay steps to follow and include in tile.
There are student outcomes to look at while using key skills in making of a tile.
Students paint these with acrylic paints and varnish with PVA glue or a Varnish gloss when dry.