Teaching Art is a feast into a of colour, line, texture, space and shape. By encouraging a visual exploration in my learning I love developing a creative approach to learning in the classroom. By encouraging different techniques and an understanding of art I hope to help students appreciate visual learning more. I hope you enjoy my uploads and can use them. Please contact me if you require any further information.
Teaching Art is a feast into a of colour, line, texture, space and shape. By encouraging a visual exploration in my learning I love developing a creative approach to learning in the classroom. By encouraging different techniques and an understanding of art I hope to help students appreciate visual learning more. I hope you enjoy my uploads and can use them. Please contact me if you require any further information.
This is a project to present the work of William Morris in a sketchbook. focusing on lettering in the Arts and Crafts style, it also shows how to do an artist critical study and can be used at KS3 and GCSE.
Success Criteria
Make an elaborate heading for William Morris showing his emphasis on NATURE
Creatively present the pictures on his work
Answer the questions with full sentences describing the characteristics of William Morris.
Copy a detail of his work.
THE POWERPOINT SHOWS how to make a small frame try to draw an enlarge a part of an image of William Morris, that is, crop a section and draw what you see in a box on your page.
(The measurements for the box is 10x12 cm and it can be Portrait or Landscape).
The overall objectives are :
To understand what the elements of art are: line, shape, colour, texture, space, value and tone. This lesson you will be completing an artist study presentation on the work of William Morris and answering the questions and making a critical analysis of his work. We will be presenting examples of William Morris’s work and making a decorative presentation using the word William Morris for a title and presenting this creatively.
This is a project about design and can be used to gain a deeper understamding how positive and negative shapes work. This is about black and white designs using the Notan technique.
This is the balancing of light and dark shapes using a Japanese idea of design.
What is Notan? is the first part of poweerpoint where students develop an understanding of how to use light and dark shapes.
Activity Objective:
To make Notan compositions and learn about balancing light and dark shapes to make a composition.
Looking at Design artists who use Notan: Marimeko, Escher, William Morris
To understand what is the meaning of ‘NOTAN’ and art terms To develop your own Notan design in your book To understand how various designers use the concept of Notan in their work.
Task 1
USING A SQUARE OF COLOURED PAPER or black paper to start
2.DRAW shapes in from the edges of each side of the square.
Draw in from edges
3.CUT OUT SHAPES FROM THE EDGES AND PASTE IN A MIRROR REFLECTION
Task 2
Try add a second layer of shapes in your design into the mirror reflection and reflect this back into design
Watch the video clip from 0.5 - see link in powerpoint
Terms in Art to define
Symmetrical
Asymmetrical
Notan
Balance
Harmony
Positive and Negative shapes
A detailed project looking at developing a Still-life project looking at composition, rule of thirds, different techniques for each object with different art styles.
Students firstly, study what is a Still-life and write up a definition for this.
Students then look at what different styles in Art before Modern Art.
Students look in detail at Dutch Still life and the Vanitas still-life.
There is also some information on the Post Impressionist artist Paul Cezanne and his style of brushwork.
A focus on what is still life?, then looking at Pop Art and what is pop Art? Students then answer questions on two Pop Artists: Michael Craig Martin and Patrick Caulfield. Students practise making a background on Pop Art in their sketchbook and answer the questions.
Students develop their own Still-life and are told to bring in objects for their Surreal mixed media Still-life and their are examples of this. Students learn to compose a layout for their still-life final using a Viewfinder and the rules of third, Fibonnacci rule to help them construct a composition. Students develop their own Still-life and are told to bring in objects for their final arrangement.
The emphasis is then to take them through different techniques with each object they brought to class. The techniques included in the project are: Wax and Scratch, Paper collage, Pop Art hard edge colours and outlines, Palette knife painting, Pencil shading and Pen drawing.
There are finally student examples of final outcomes for this project to support the outcome.
A Key Stage 3 project on Surrealism. A WEALTH of resources for this project giving starters and different short tasks with a landscape surreal project to improve skill in painting.
year 7
Diagnostic for year 7
Celtic letters
Paper mache plants
Clay Gargoyles
year 8
Cubism
Making Insects - paper craft
Modern Movements - collage and paint
Surrealism - painting project
This is a GCSE coursework project on a theme called ‘Surfaces’ giving you loads of ideas to develop with your students. It deals with developing ideas to gain confidence with different media and to develop sketchbook skills. It is about the process of developing the Examboard Assessment Objectives AO1- Develop ideas from artists and AO2 Exploring different media for coursework.
It gives a set of observational photographs to work from for Assessment Objective 3 - AO3.
It gives you different artists to look at to gather resources on and students will be able to use these as artist studies and begin to explore these artists techniques and do studies in their book. This if for Assessment Objective 1 and students can gain ideas on ways to develop their skills in techniques through these artists and in so doing ‘Develop ideas’.
There are further sets of techniques for Assessment Objective 2 and one can explore, experiment with ideas for developing ‘creativity’ in your classroom. That is, exploring a number of different media and showing how one can take risks with the media in order to create an interesting effect. There are slides giving you a set of techniques to use - explaining how to use media in creative ways. These techiques link with the list of artists given on slides to start with.
The experimental techniques are:
=white paint printing,
=wax and scratch,
=distressing surfaces,
=dripping paint, scraping paint,
=using sgrafitto,
=cardboard collaging
=layering digital manipulations with collage
=using fabric and sewing into surfaces.
Emphasis here is that students should play and take risks and experiment with different materials and begin to layer and be able to draw on different surfaces.
It is a fun set of techniques at GCSE and/or A-level with students using their own resource material and developing their confidence and fluency with making creative experiments. Students can develop their own responses using the techniques.
There are questions so that students can write a final evaluation.
After this set of work students should be confident and independent enough to find their own photographs and to develop their own idea for a final piece for Assessment Objective 4.
A support for teaching GCSE art
A number of powerpoints on individual artists to use as part of Developing ideas for Assessment Objective One.
Learning skills in Art
Acrylic painting with card - Viera Da silva
painting layers and using Gold - Victoria Crowe
Photocopy drawing with Chila Burman
Klimt patterns
Transfer medium with Robert Rauschenberg
Tim Burton drawings and fantasy art
Printing with Angie Mitchell relief prints
Figure drawing and simplification using Henry Moore
City street painting with Lowry
Peter Blake graphic CD cover
Photography of Cindy Sherman
All of these tasks will build skills for GCSE final project
Starting in year 9 and year 10 begire students choose own topic to develop
This tasks help to assess abilities and specific skills in Art. This helps to establish a Baseline Assessment for Art after having completed all these exercises. This should take 10-12 lessons. Please work through each exercise carefully.
The aim of this diagnostic assessment is to look at specific skills used in art.
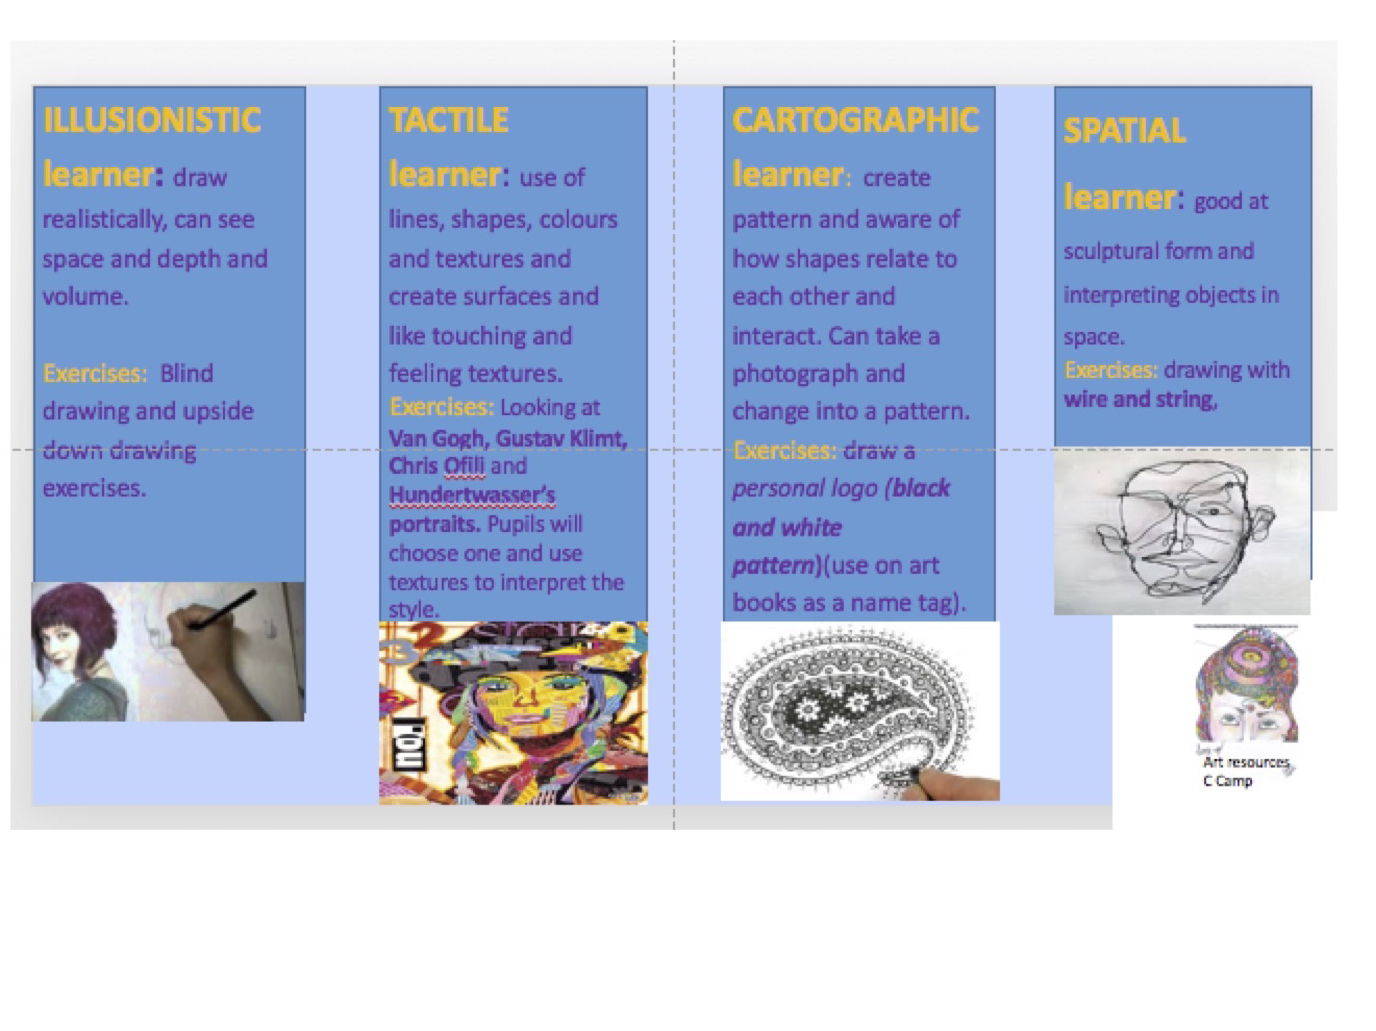
This diagnostic study is to try to assess different skills in Art. The tasks given are for the different learning/skills in art and it allows the pupils to explore these. There are tasks given for each area of learning.
Areas of learning with task:
ILLUSIONISTIC learner: draw illusionistically, blind drawing and upside down drawing exercises.
CARTOGRAPHIC learner: draw a personal logo (black and white pattern)(use on art books as a name tag).
TACTILE learner: Looking at Van Gogh, Gustav Klimt, Chris Ofili and Hundertwasser’ portrait works, their use of lines, shapes, colours and textures. Pupils will choose one of these artists to develop in a tactile way using re-cycled materials.
SPATIAL learner: drawing with wire and string, assess whether good at sculptural form.
Furthermore, assess the students ability to write ANALYTICALLY and to critically analyse a painting… The pupils will also need to self assess and evaluate their outcomes.
At the end of this exercise we would be able to assess pupils strengths and weaknesses in art at KS 3 and there are many opportunities in the presentation for evaluation.
How to create an illusionistic space and to draw from first hand observation using blind drawing skills, contour line drawing, upside-down drawing and mark-making.
Focus on how to shade using dark and light tones with pencil and biro pens and focus on mark-making.
3 a To critically analyse other artist’s styles and techniques and select and question critically, making reasoned choices when developing work from observation.
3 b. Explore tactile qualities and select a range of materials to interpret a style of an artist. Develop a portrait using tactile materials.
Investigate how to express ideas using design skills and design processes and the formal elements like line, colour and flat shapes with patterns
Exploring drawing with a 3D structure and looking at shape and line with construction of wire developing spatial recognition.
Analysing an artwork and investigating the formal elements used in an artwork.
Reflect on and evaluate one’s own and others’ work, adapting and refining the outcomes.
Presentation should also be assessed at the end of these exercises. Students should also always write a heading and the lesson objective clearly at the top of each page. There are clear evaluation sheets and assessment opportunities in the unit of work.
All tasks are presented with Lesson Objective and clear practical tasks.
This is a full unit of work on Still life. It starts with an appreciation of what was before there was Modern Art and students draw a mindmap in their book.
There is a wealth of pictures of still-life objects to draw from so teachers can just copy the slides for students to work from.
Students will need to do a mark-making exercise in pencil and pen and complete two drawings of the objects.
Students then look at how to use chalk and charcoal on black paper and do a study of Still-life in the Dutch era by looking at the ‘vanitas still-life’s’ and do a skull drawing using the chalk and charcoal. Students will also need to practice markmaking in this technique.
Students then go on to look at Pop Art and what happened with the development of photography and the influence of this consumer style on the art world. There is a study of Pop Art and students will be able to have an opportunity to look at what makes up Pop Art. The students need to make up a Pop art style, coloured collage in coloured paper or use felt tips to create an object in Pop art style.
There is on this powerpoint a wealth of objects for students to draw from and this can be printed off for students.
Finally students put this together into a finished still life arrangement and there are lots of student examples for you to use.
I hope you enjoy this project.
This is a unit of work for the first 12 weeks at school.
There are questions to assess the students knowledge of Art from KS2 and then a project to assess he strengths and skills of the students. This is a diagnostic project looking at the Illusionary, Spatial, Tactile, Cartographic skills of the students with tasks to do.
There is also a fun project on making a sketchbook and giving prompts to help students to be creative in the Keri Smith powerpoint.
The objectives
To find out about what you have learnt at primary school in Art To understand what the elements of art are: line, shape, colour, texture, space, pattern and tone are and to make a creative display page of these words in your books on an A4 page
There are questions to assess what was achieved in Primary school
There is also a short general knowledge task
Basic Visual Information on Elements of art
Finally a presentation on the Elements of art
Success Criteria
1.Create an interesting display on an A4 or A3 page
2.Creatively arrange the elements
3.Write out the names of the elements clearly and display the word visually
4.Choose a variety of colours and different marks to display the element
Visually show patterns for the elements or draw a picture you like to show for the element of art
A scheme of work starting with a pencil drawing, then a monoprint and the students interpret this in different artist styles.
Asian -British artist, Chila Burman and Frida Kahlo with a variety of different portrait artists to look at.
They use the monoprint and combine this with a Pop art collage
The students then take a photograph and then do a cultural drawing in felt tips interpreting this using cultural patterns.
I have also added a few other portrait powerpoints to use in the project.
A history of art powerpoint showing key sculptural examples from the early Paleolithic sculpture to the work of Michelangelo showing all the key developments in form to show more realism.
There are lots of notes to provoke discussion in the class on the different sculptures.
Various comparative tasks can be given to develop students ability to analyse the sculptural forms.
This also tells the story of art and the development of sculptural form in Art and how art develops through the ages from Paleleolithic, Egyptian, Greek - Archaic, Classical, Hellenistic Art and Gothic Art following with Early Renaissance and the work of Donatello to the work of Michelangelo in Late Renaissance.
Students learn about key sculptures to develop their knowledge of art and begin to understand how sculptural form developed.
There is a beginning of understanding how the first sculpture was a small fertility form - the Venus of Willendorf and how this was used to empower people and how this then develops to capture the emotion and pathos in the work of Mary Magdalene by Donatello.
Many comparisons can be drawn and it enables students to see the development of form and so understand the history of art.
One deals with making a modern figure sculpture and the other gives you a background to the development if sculpture through the ages.
Looking at the development of the figure through the ages from Neolithic to Renaissance art.
This is a very successful drawing lesson to build confidence with drawing. It can be used at any level as skills are on invaluable. It can be stretched over two lessons.
I have a shoe box of little ornaments wrapped in fabric and tied up with tape that I use for this lesson and over the years this is one of my favourite lessons.
I finally tried to make a powerpoint and hope you enjoy !
There is a drawing starter exercise
Then the fun begins
Objectives
To explore observational drawing techniques: blind drawing and contour drawing
To investigate how to capture techniques (markmaking) when drawing
To build confidence in capturing a form with line by using different styles when drawing: gestural drawing and pattern drawing
To develop a design from observational details
There are 17 drawings to make … and each slide gives you the instruction and an example of drawing
Resources
A3 cartridge
sharp 2B pencil
small objects to draw wrapped to start
oil pastel each
Fine-liner each
ruler
pencil rayons
small bit of tracing paper cut in squares ( size of unit for repeat)
starting with the following
. TOUCH DRAWING
Draw through TOUCH ONLY
Feel the object under a cloth draw the object – and try to imagine the shape, texture, and form
Try to draw and outline only.
2 minutes
BLIND DRAWING
Draw with CONTINUOUS LINE and BLINDLY 3 min
Draw the object and draw blindly. DO NOT LOOK AT YOUR PAPER as you draw.
Instead imagine your pencil as a contour ( an ant crawling on the object) exploring all the edges, outlines, shapes, textures and details of the object.
2 minutes…
Follow the slides
There are pictures of student examples.
Success criteria
The line and markmaking quality is MORE important than accuracy
This gives students a realisation that drawing is about lines and marks.
These are important skills for Key Stage 3
There powerpoints aim to develop the following skills below and in so doing develop confidence in drawing
Line exercises with blind, contour, gestural drawing skills
Upside down drawing -how to copy
Sphere drawing - teaching tonal drawing
Drawing to create an impact with pattern and different techniques - feather drawing
Portrait drawing - looking at proportions in a face drawing
Fun- confident line combining a photo in drawing
This is a project for A-level students starting with looking at Geometric Abstraction and the use of the colour ‘White’ in the work of modern abstract artists. This will help students to develop their own personal theme. This is a good starting theme for A-level students or IB students and gives them a process or idea to start with in order to develop their own personal outcome. It gives some examples to prompt the students to start thinking of: What is Abstraction, Conceptual Art, Cubism Abstraction and Geometric Art?
Students are asked to research various artists who show Geometric abstraction and ‘white’ from the Islamic artists to Kasimer Malevich (Suprematism), Wassily Kandinsky and Piet Mondrian.
The project continues giving the A-level students some practical tasks to develop the idea of how to paint a ‘white’ object.
There are also examples of some contemporary artists who use geometric abstract shapes and abstraction in nature.
Students should be asked to find their own artists they like who use Geometric abstraction and white.
Students then explore artists who have used white and look at how they use white in a textural way. Students can look at Robert Rauschenberg. Ben Nicholson and Barbara Hepworth.
Students choose one artist and make a booklet exploring their analysis of the artists and the way they use white, but also an experimental booklet showing how to show ‘white’ textual surfaces.
Students also take photographs of objects which are ‘white’ to develop further using different media and then subsequently to develop their own final piece based on their own personal research into the subject ’ white’ and ‘geometric abstraction’.
Examples of student’s work is given to help students explore various media to develop their own personal ‘white’ outcome.
There are also examples of final pieces of A-level students who tried to paint something white showing how they used pastel colours in their finals to develop their outcomes.
A group of different A-level Art projects and tasks to develop
Information to absorb about Art - On Style and Principles and Elements
Examples of student work
Drawing exercises linked to contextual skills
Good for introduction to course.
Academic theorists to use like John Berger and H Wolfflin to encourage discussion and a deeper understanding.