Hello!
My teaching experience includes teaching students at the Primary and the Middle school levels. I find each teaching experience so unique and a scaffold for further teaching and learning.
As learning is eclectic, I focus on creating resources that are not just practical and meaningful but also fun.
So connect with me to motivate, inspire, and empower.
Laurane @teach2tell.com
MULTIPLICATION: TIMES TABLES: CENTRES ACTIVITY
Help your students know their multiplication tables with this fun interactive 0 to 12 times tables wheel pack. There are two writing styles for each of the times tables from 0 to 12. Choose the one you prefer to use in the classroom consistently for students to excel in their multiplication facts.
Multiplication facts of 0 will help students better gain conceptual understanding of the value of zero.
WHAT'S INCLUDED:
✓ 13 cover wheel templates from 0 to 12
✓ 13 base wheel templates from 0 to 12 (style A: 2 x 1 = 2)
✓ 13 base wheel templates from 0 to 12 (style B: 1 x 2 = 2)
ASSEMBLY INSTRUCTIONS:
→ Have students first personalise their wheels. They write their name, colour and write in the multiplication facts.
→ Cut around the circle boundary of each wheel.
→ Attach both wheels in the middle with a fastener.
→ Spin to see and practise each multiplication fact.
I hope your students will know their multiplication facts like clockwork with the help of these wheel templates.
Use this flipbook organiser to scaffold the structure of a fiction Book Report. The prompts for each of the key elements of the Report will help students write effectively and keep on track.
WHAT’S INCLUDED:
→ Six posters/anchor charts on a fiction book report and its key elements. Print, laminate and display in class and/or view as PDF slideshow.
→ Cover (editable) templates x 8 (students details and quote editable)
→ Editable templates x 5: The Setting, Main Characters, The Summary (x2), What I Thought (prompts editable)
→ Lined sheets for publishing x 4
→ Teacher Marking Rubric x 3
→ Self-editing and Peer editing Checklists
→ Banners (plain and decorated)
*************************************************************************
SUGGESTED USE:
♦ Project the PDF file on the interactive notebook to introduce the parts of a fiction book report via the posters/anchor charts. Also show students the flipbook templates and completed sample. Discuss the requirements for each template of the book report.
♦ Have students collect information in their flipbook on the specific book under study. This could also serve as their draft where they could use the self-editing and peer-editing checklists to edit. Finally have students publish on given writing sheets or type out content from draft observing corrections.
*************************************************************************
HOW TO ASSEMBLE FLIPBOOK:
You can choose either of the two options.
⇒ Print out the templates in blackline. Cut around each template and assemble from smallest template to largest template. Have students colour in pages. Staple at top tab for flipbook or glue descending order in notebook.
⇒ Print out the templates on cardstock (different colours). Cut around each template and assemble. Attach at top.
*************************************************************************
PREPARATION
→ For grades 2-3, bundle up to 6 sheets together after sorting, align them perfectly and cut.
→ For grades 4-6, students are old enough to cut and compile flipbooks on their own. I have my students compile all sections of the flipbook prior to research and writing.
DISPLAY
After completion, display students’ flipbooks under the Banner.
These flipbooks are sure to make an interesting bulletin board display.
How often have we been inspired by reading about other people’s lives, the major events that contributed to who they became in society and the impact they had on those around them? well, perhaps far too many times to recall.
This unit on writing a Biography will not only take your students on a journey of learning and discovery about the lives of prominent individuals who have shaped our society for the better, but also enable them to hone their research skills and in the process adhere to the structural components of writing a Biography.
The 20 QR codes, editable flipbook, and interactive notebook templates will serve as effective research and writing tools for scaffolding at every stage of the writing process. Links are also provided to enable students to research their subject. The QR codes are sure to lend great excitement to the activity as students eagerly find the person they have to research and write a biography on. You may download the free QR code reader i-nigma to scan the QR codes.
WHAT’S INCLUDED:
1. Posters/Anchor Charts on structural elements.
2. INB TEMPLATE 1: IDENTIFYINGTHE STRUCTURE OF A BIOGRAPHY: 6 shutter flaps that provide scaffolding on adhering to the structure of a Biography. The cover of each flap comprises of questions to guide research.
3. INB TEMPLATE 2: IDENTIFYINGTHE STRUCTURE OF A BIOGRAPHY : Three shutter flaps that include key questions that focus on the Introduction, Body, and the Conclusion of a Biography.
4. INB TEMPLATE 3: LET THERE BE ORDER: Ten shutter flaps that focus on adhering to the chronological order when writing a biography. Students interview a friend to collect information in sequential order of the events. ‘Girl’ and ‘Boy’ templates included.
5. INB TEMPLATE 4: JUST FOR LAUGHS: Students imagine they are writing a biography on a famous nursery rhyme character and collect information in a one page organiser.
6. INB TEMPLATE 5: PICTURE STIMULUS: Choice of 4 pictures. Students select any one picture and imagine the life of their character. They record information to guiding question in the 10 flap organiser and then write out a biography on the chosen character represented in the picture.
BONUS ORGANISERS:
1.Bio Cube Organiser: information on the subject is collected in a cube shape template. This can be suspended as a mobile or stacked on a flat surface in the classroom to form a Bio cube mini wall.
2.Timeline Organisers: choice of 10, 12, and 15 events that can each be recorded on a single template.
WHAT ELSE:
* Self-editing checklist
* Peer-editing checklist
* Teacher Grading Rubric
* 20 QR Code Cards to make the research process exciting.
* Flipbook templates - EDITABLE
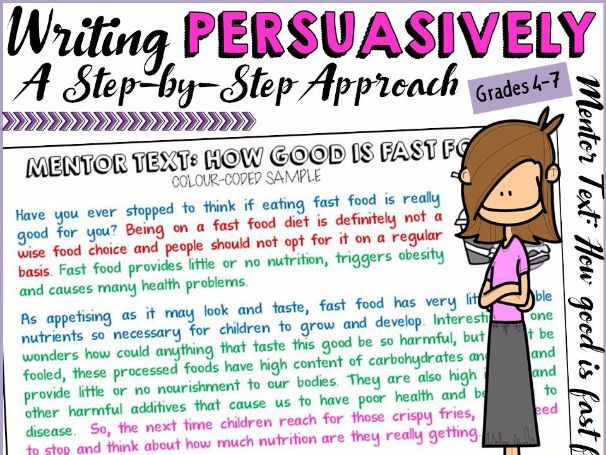
If you would like to teach your students a step-by step approach to writing persuasively and also scaffold every stage of the writing process, then you will find this resource very useful. All components in this pack are designed to facilitate students to write persuasive essays effectively in preparation for formal/Naplan testing.
The materials adhere to a formal writing style complete with close detail to elements of structure and composition of persuasive texts whereby opinion is supported by relevant details. Further details of lessons included in this pack are outlined below:
* All lessons to teach and model the parts of a Persuasive Essay revolve around the mentor text, ‘How Good is Fast Food?.’ Application of writing skills is targeted in the close writing prompt: The Importance of Eating Clean. The graphic organisers also enable students to write on other topics of choice.
LESSON 1: THE STRUCTURE
✓ Persuasive Writing Anchor Charts x 3
✓ Mentor Text x 1 on the topic ‘How Good is Fast Food?’
✓ Cut and glue parts of the mentor text activity to study structure
✓ Colour-code parts of the mentor text to study the structural components of the introduction, body and conclusion.
✓ Questions x 23 to draw attention to structure (to use with mentor text and informative article)
LESSON 2: THE INTRODUCTION
♦ Scaffolded activities based on the mentor text to enable students to write the three parts that make-up the introduction: hook, opinion and thesis statement.
LESSON 3: THE BODY
♦ Cut and glue interactive activities and reference to mentor text to help students better understand the parts of the three body paragraphs: the topic sentence encompassing the reason, supporting details and concluding sentence.
LESSON 4: THE CONCLUSION
♦ Reference to colour-coded mentor text and deconstructing parts of a concluding paragraph activity to better understand the parts: summary statement, re-statement of reasons and call to action.
ALSO INCLUDED:
✓ Graphic organisers to organise ideas of the introduction, body and conclusion when planning to write on a given prompt are included for all lessons.
✓ Writing templates for published pieces.
✓ Self-editing checklist
✓ Peer-editing checklist
✓ Teacher marking rubric
✓ Booklet cover for all lessons if compiling lesson sheets.
✓ Posters x 6 on Persuasive Writing Signal Words
Once you have taught students the style and structure of a Persuasive Essay, the job is half done. All the best! I hope you will have an idea of how I have used this resource with my students via the guided notes for each section. Further instructions on how to use this resource are in file.
Wish you and your students a successful year!
If you would like to teach your students a step-by step approach to writing persuasively and also scaffold every stage of the writing process, then you will find this resource very useful. All components in this pack are designed to facilitate students to write persuasive essays effectively in preparation for formal/Naplan testing.
The materials adhere to a formal writing style complete with close detail to elements of structure and composition of persuasive texts whereby opinion is supported by relevant details. Further details of lessons included in this pack are outlined below:
* All lessons to teach and model the parts of a Persuasive Essay revolve around the mentor text, ‘The Need to Have a Best Friend.’ The graphic organisers also enable students to write on other topics of choice.
LESSON 1: THE STRUCTURE
✓ Persuasive Writing Anchor Charts x 3
✓ Mentor Text x 1 on the topic ‘The Need to Have a Best Friend’
✓ Cut and glue parts of the mentor text activity to study structure
✓ Colour-code parts of the mentor text to study the structural components of the introduction, body and conclusion.
✓ Questions x 23 to draw attention to structure (to use with mentor text and informative article)
LESSON 2: THE INTRODUCTION
♦ Scaffolded activities based on the mentor text to enable students to write the three parts that make-up the introduction: hook, opinion and thesis statement.
LESSON 3: THE BODY
��� Cut and glue interactive activities and reference to mentor text to help students better understand the parts of the three body paragraphs: the topic sentence encompassing the reason, supporting details and concluding sentence.
LESSON 4: THE CONCLUSION
♦ Reference to colour-coded mentor text and deconstructing parts of a concluding paragraph activity to better understand the parts: summary statement, re-statement of reasons and call to action.
ALSO INCLUDED:
✓ Graphic organisers to organise ideas of the introduction, body and conclusion when planning to write on a given prompt are included for all lessons.
✓ Writing templates for published pieces.
✓ Self-editing checklist
✓ Peer-editing checklist
✓ Teacher marking rubric
✓ Booklet cover for all lessons if compiling lesson sheets.
✓ Posters x 6 on Persuasive Writing Signal Words
Once you have taught students the style and structure of a Persuasive Essay, the job is half done. All the best! I hope you will have an idea of how I have used this resource with my students via the guided notes for each section. Further instructions on how to use this resource are in file.
Wish you and your students a successful year!
This resource will help your students write the tightening tension in a narrative. Writing lessons scaffold the writing of the exposition, inciting incident, rising action (pebble, rock, boulder).
In addition, the graphic organizers, checklists, integration of technology (QR codes), and writing activities involving a short animated movie will facilitate your students to write with impressive style and technique.
The unit is divided into three sections.
SECTION 1: Scaffolding Structural Components
Cover Sheet (if compiling pages into a booklet)
Sheets that scaffold the writing of the exposition, inciting incident, rising action (pebble, rock, boulder) through a sample text.
Activity
Students will respond to 40 questions on the structural components and language devices used in the mentor text. Students will find and highlight evidence in the sample text. They will document responses on the Story Map, Sensory Details, Figurative Language and Writing Techniques organizers.
SECTION 2: Summary; Analyzing Structural Components, Sensory Details and Figurative Language
Sheets featuring 21 questions that analyze the structural components, sensory details, and figurative language used in the sample text
Sequencing of events sheet. Cut and glue option included.
Activity
Students will answer 21 multiple-choice and written response questions based on the sample text, ‘Water, Water – Everywhere’.
This activity may also be given as an assessment after completing section 1.
Students will sequence the events in order, for an extract, to better understand how events increase in intensity and add to suspense and tension.
SECTION 3: Writing the Tightening Tension
Writing assignment with scenario
Writing prompt sheets
Story Map
Sensory Details, Figurative Language and Writing Techniques organizers.
Self-editing and peer-editing checklist
Activity
Students will respond to the writing assignment and writing prompts. They will use the story map, Sensory Details, Figurative Language and Writing Techniques organizers to plan their writing. They will use the self-editing checklist and peer-editing checklist to check they have included all components. Students need to be introduced to the different types of figurative language prior to writing a tension scene.
Teacher Key included for all sections.
This resource will help your students write a narrative’s exposition, orientation, lead, or Introduction Paragraph.
Writing lessons scaffold the writing of sizzling starts.
The Backfill and the Get Back techniques conclude the writing of the exposition.
In addition, the graphic organizers, checklist, integration of technology (QR codes), and writing activities involving a short animated movie will facilitate your students to write their impressive openers.
The unit is divided into three sections.
SECTION 1: Sizzling Starts
Written samples are provided to demonstrate the writing of each sizzling start.
Students will then write their own sizzling starts after identifying the different openers and analyzing the written samples.
They will watch the short animated movie and write on the scene using each of the five main types of sizzling starts.
SECTION 2: Backfill and Get Back
Students will color code the sizzling start, backfill, and get back in written samples. They will match a Backfill to its Sizzling Start and write the Get Back to conclude the exposition.
SECTION 3: Writing the Exposition
Students will answer wh-questions to analyze sample expositions.
They will use the wh- questions graphic organizers to plan their expositions for given visual prompts. They will use the Expositions Checklist as they write the sizzling start, backfill, and get back for each exposition.
Teacher Key included for all sections.
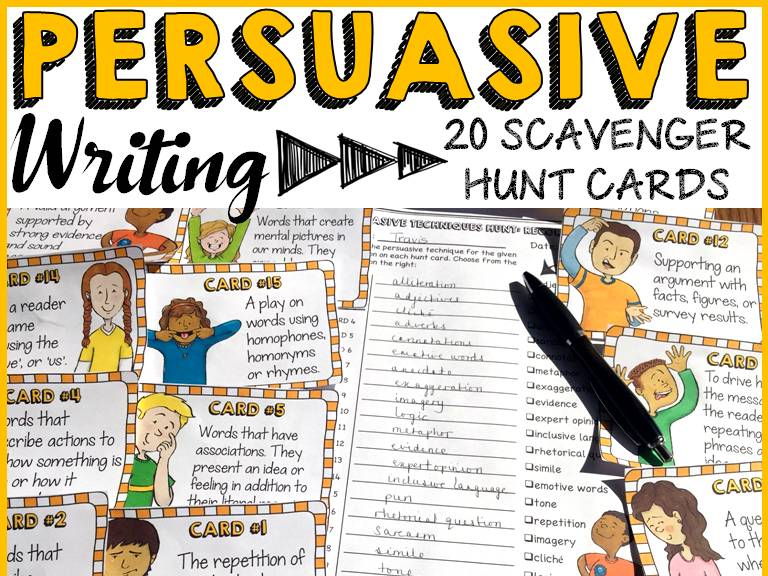
Teach students 20 persuasive techniques of the persuasive writing genre with this interactive fun resource. This pack includes 20 Scavenger Hunt cards, 1 Recording Sheet, and an Answer Key to equip students with necessary content information on persuasive writing techniques that they can apply to their own persuasive essays.
The persuasive techniques featured in the 20 hunt cards are:
✓ adjectives
✓ adverbs
✓ alliteration
✓ anecdote
✓ sarcasm
✓ connotations
✓ metaphor
✓ exaggeration
✓ evidence
✓ expert opinion
✓ inclusive language
✓ rhetorical question
✓ simile
✓ emotive words
✓ tone
✓ repetition
✓ imagery
✓ cliché
✓ logic
✓ pun
ACTIVITY
Place the 20 information cards on Persuasive Writing Techniques around the classroom. Students can work individually, in pairs, or in small groups to find the answers to all 20 questions on their recording sheets. They must read the information on each card to find the answer for each corresponding question on their recording sheets.
EVIDENCE OF LEARNING
♦ After the hunt, discuss the answers as a class. I have the pdf version of the hunt open on the interactive whiteboard, so students refer to the information card for each question on their recording sheets.
♦ The interactive nature of the hunt makes it fun for students to learn the persuasive techniques characteristic of a persuasive essay. Students will be more confident to use these techniques when writing.
Please note that the 20 Hunt cards feature just a definition of each technique type. Students need to read the definition and identify the persuasive technique. This will enable you to assess prior knowledge and also enable students to consciously think of the answer prior to responding or to make an educated guess.
Wish you and your students a successful year!
Teach students the structural components of the persuasive writing genre with this interactive fun resource. This pack includes 20 Scavenger Hunt cards, 3 Recording Sheets, and Answer Key pages to equip students with necessary content information so that they are able to adhere to the structural format when writing their own persuasive essays.
The structural components featured in the 20 hunt cards are:
✓ The Introduction: hook, opinion, thesis statement
✓ The Body: topic sentence, supporting details, concluding sentence
✓ The Conclusion: summary statement, re-statement of reasons, call to action
✓ Transition words
✓ High-modality verbs
✓ Ethos, pathos, logos modes of persuasion
ACTIVITY
Place the 20 fact cards on Persuasive Writing around the classroom. Students can work individually, in pairs, or in small groups to find the answers to all 20 questions on their recording sheets. They must read the fact card to find the answer for each corresponding fact question on their recording sheets.
EVIDENCE OF LEARNING
♦ After the hunt, discuss the answers as a class. I have the pdf version of the hunt open on the interactive whiteboard, so students refer to the fact card for each question on their recording sheets.
♦ The interactive nature of the hunt makes it fun for students to learn the structural components of a persuasive essay. Once students adhere to structure when writing, the job is half done.
Once you have taught students the style and structure of a Persuasive Essay, the job is half done. All the best!
Wish you and your students a successful year!