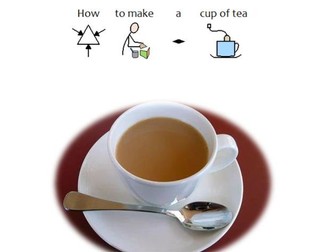
A printable recipe/instruction guide for PMLD/SEND learners.
Included in the resource package:
Symbolled recipe & instructions
Text recipe & instructions
Evaluation sheet
10 pages of black and white picture cards, helping words and color coded cursive (font:CCW Cursive Dotted1) in a writing frame to promote sequencing and fine motor skills. Also find the extra word, find the object and count and write a picture and word story exercises.
I printed each page off separately and gave one to each child. I used the first page as my guide, and we went through the steps of making a cup of tea, deciding who had the first step, laying that on the table, then adding an arrow to the next step. Helped to explain flow charts in an explanation.
A range of resources for The Tiger Who Came to Tea - something for each EYFS area of learning. Lots of posters and picture prompts and lesson ideas.
Copyright: images comply with their copyright. I have copyright for the clipart.
Here’s how to make a plasticine Eye of Horus with easy to follow, child friendly, step by step instructions.
Suitable for children aged 7 and upwards including SEN children.
Great for topics about Ancient Egypt. This also works well for after school clubs, as a golden time activity and can be completed in the space of a lesson (up to an hour and a half).
This project works best as a one to one activity or in small groups.
What you need:
yellow plasticine
blue plasticine
rolling pin
mat to work on
pencils
tea towel
What you get:
Powerpoint step by step instructions - ‘I can make an Eye of Horus’ (for children who are right handed)
Powerpoint step by step instructions - ‘I can make an Eye of Horus’ (for children who are left handed)
Printable step by step instructions for ‘I can make an Eye of Horus’ (both left and right handed versions).
Video animations showing how to make an Eye of Horus (one for left handed children and one for right handed children)
Video showing how to make a ball
Video showing how to flatten your plasticine with a rolling pin
Video showing how to roll thin sausage shapes
Information for teachers:
How the projects work
Things you will need
Lesson plan
Preparing for your workshop
Health and Safety
Certificate of Achievement
These projects help children learn and practice basic skills which can then be used to create their own projects and enhance their own creativity. Although your children are making the same project, they will all look different.
Mini-makes are fun projects for your children that use very small amounts of air-drying clay. Here’s how to make an Easter egg decoration. Although the shape is simple to make, the children can create a variety of different ways to decorate their eggs which are demonstrated in this resource. There is also information on how to turn this project into a display to brighten up your classroom for Easter.
Suitable for children aged 7 (Year 2) and upwards including children with special educational needs and those who need help with their mental wellbeing. This also works well for after school clubs or as a golden time activity. Also suitable for Forest schools if you wish to make an Easter egg tree.
This project works best as a one to one activity or in small groups.
Please note, due to the fact that the clay needs to dry, this project needs to be completed over a few sessions.
What you need:
DAS clay
Pot of water
Paintbrush
Strip of thin recycled cardboard
Paperclips
Paper plate
Palette
Acrylic paints
Metallic acrylic paint
Palette
Ribbon or gold thread
Mat to work on
Tea towel
What you get:
Powerpoint step by step instructions - ‘I can make an Easter egg decoration’.
Powerpoint step by step instructions - ‘How to decorate your egg’.
Video showing how to make an Easter egg decoration.
Video showing things to watch out for when making.
Information for teachers:
How the projects work
Things you will need
Lesson plan
Preparing for your workshop (including tips for decorating)
Health and Safety
Certificate of Achievement
These projects help children learn and practice basic skills which can then be used to create their own projects and enhance their own creativity. Although your children are making the same project, they will all look different.
In addition to our own resources we have been able to make available an informative guide to medal-making, created by Wolverhampton Arts Museums and inspired by their work with the prolific and enthusiastic medalist Ron Dutton. This guide shows you how to make portrait medals, but can be adapted to suit the needs of any class.
Here’s a fun activity for Halloween! Four different ways to make a spider on a web using plasticine and play-doh with easy to follow, child friendly, step by step instructions.
These projects are suitable for after school clubs, golden time, or as a one to one activity with a child with special needs.
Main project - ’I can make a spider on a web’
Differentiation options -
Extra mild - ‘I can make a play-doh spider on a web’
Spicy/Hot - ‘I can make a spider on a jam jar lid’
Extra Hot - ‘I can make a spider on a white web’
Each project does not have to be finished in one session but the main project, ‘I can make a spider on a web’ and the play-doh version can be if needs be.
These projects work best as a one to one activity or in small groups.
Suitable for children aged 7 and upwards. Play-doh version suitable for children aged 6 and upwards.
What you need:
orange plasticine
black plasticine
white plasticine (for differentiation project)
orange and black play-doh (for differentiation project)
lolly sticks
rolling pin
mat to work on
pencils
tea towel
scissors (for differentiation project)
Recycled things to collect:
jam jar lids (for differentiation project)
strong cardboard (for differentiation project)
large yoghurt pots (for differentiation project)
What you get:
Powerpoint step by step instructions - ‘I can make a spider on a web’
Printable step by step instructions for ‘I can make a spider on a web’
Powerpoint step by step instructions - ‘I can make a spider on a jam jar lid’
(left and right handed versions)
Powerpoint step by step instructions - ‘I can make a spider on a white web’
(left and right handed versions)
Powerpoint step by step instructions - ‘I can make a play doh spider’
Video animation showing how to make a spider on a web
Video animation showing how to make a spider on a jam jar lid
Video animation showing how to make a spider on a white web
Video showing how to make a ball and a bean shape
Video showing how to flatten your plasticine with a rolling pin
Video showing how to roll thin sausage shapes
Powerpoint showing how to make basic shapes
Information for teachers:
How the projects work
Things you will need
Lesson plan
Preparing for your workshop
Health and Safety
Certificate of Achievement
These projects help children learn and practice basic skills which can then be used to create their own projects and enhance their own creativity. Although your children are making the same project, they will all look different.
The remaining teeth of Granny W are pretty darn sweet! Can students help her decide on how to make the sweest tea possible using their understanding of solubility from the Five S's treasure hunt lesson? (I hope they can).
After using a model of rice and peas to demonstrate solvents, solutes, solution and saturation students are introduced to the scenario.
Students are split into six groups and given information packs related to one of three experiments (two groups for each experiment).
Students will have an A3 poster style planning sheet to plan and complete an experiment to test whether:
-Water has a saturation point?
-Temperature of the solvent affects solubility of the solute?
-Surface area of the sugar affects solubility?
Students complete their posters and share their findings to the class.
Here’s how to make a dragon for Chinese New Year with easy to follow, child friendly, step by step instructions.
This project works well for after school clubs, golden time, or for children with special needs. The powerpoint instructions are split into twelve steps which can be completed over a series of sessions. If working on a one to one basis, this project can be worked on as and when required.
Please note that this project works best as a one to one activity or in small groups and will probably take more than one session to complete.
Suitable for children aged 8 and upwards.
What you need:
orange plasticine
red plasticine
lolly sticks
rolling pin
mat to work on
pencil
tea towel
scissors
ruler
cardboard
felt tip pen lid
Recycled things to collect:
jam jar lids (for variation)
strong cardboard
What you get:
Powerpoint step by step instructions - ‘I can make a Chinese dragon
Printable step by step instructions for ‘I can make a Chinese dragon’
Powerpoint step by step instructions for variation - ‘How to make a jam jar lid base.
Video animation showing how to make a Chinese dragon
Video showing how to make a ball
Video showing how to make the shape for the body
Video showing how to make the scales around the neck
Video showing how to roll thin sausage shapes for the border
Information for teachers:
How the projects work
Things you will need
Lesson plan
Preparing for your workshop
Health and Safety
Certificate of Achievement
These projects help children learn and practice basic skills which can then be used to create their own projects and enhance their own creativity. Although your children are making the same project, they will all look different.
Here’s how to make Diya (lamps) for Diwali using the pinch pot/thumb pot method. This resource includes video demonstrations and easy to follow, child friendly, step by step instructions.
Suitable for children aged 7 and upwards including SEN children and any child needing additional support. If you are new to clay, allow a whole afternoon to make this project if you can. This project also works as a one to one activity or in small groups.
There are two videos included in this resource, how to make a Diya and put patterns on it and how to decorate it when it is dry. There are two powerpoints to accompany the making video and one powerpoint to accompany the decorating video which include step by step instructions.
What you need:
clay
pencils
lolly sticks
LED tea lights
paintbrushes
acrylic paints
What you get:
Video showing how to make a Diya with suggestions for patterns
Video showing suggestions on how to decorate your lamp
Powerpoint step by step instructions - I can make a Diya
Powerpoint step by step instructions - I can put patterns on my lamp
Powerpoint step by step instructions - How to decorate your lamp
Information for teachers:
How the projects work
Things you will need
Lesson plan
Preparing for your workshop (including tips for decorating)
Health and Safety
How to recycle your clay
Handling clay
Looking after your clay
Certificate of Achievement
These projects help children learn and practice basic skills which can then be used to create their own projects and enhance their own creativity. Although your children are making the same project, they will all look different.
My students always seen to struggle to write a good scientific conclusion so I collaborated with my colleagues in the English Dept to come up with a way to help them. We used the PEE paragraph as a starting point and produced these posters to help the students. I then used it with a practical we were doing at that time (which shaped tea bag makes the strongest tea) to demonstrate a good conclusion.
Three weekly plans based around 'The Tiger That Came For Tea'. Inclueding some resources that could be used. Working progress so any sugestions/comments welcome!
50 demonstrations and experiments that have been used to make science engaging and memorable. There is a range of practical demonstrations and investigations for biology, chemistry and physics for different scientific topics for key stage 2, 3, 4 and 5.
Topics include chemical reactions, nuclear fission, nuclear decay, half-life, life cycle of the star, food and digestion, sound, waves, earth and its atmosphere, speed, velocity, acceleration, DNA, genetics, cells, momentum, energy, efficiency, combustion, respiration, inertia, change of state, forces, magnets, electricity, polymers, super cooling, pykrete, seed dispersal, moments, heat transfers, convection, terminal velocity, rate of reaction, rockets, pH, acids and alkalis and pressure.
This resource has an excellent range of resources including writing templates and scaffolds, a matching game, bingo and many literacy and early number activities and worksheets. There are also templates of the characters for stick puppets.
There are photographs, borders, labels and titles that will enable you to create an instant, bright and informative display.
This resource is designed for Reception and Key Stage 1 (5-7 year olds).
This resource pack will save you hours of your own time so don’t try to reinvent the wheel – we’ve done it for you!
Images were generated using graphics resources from Microsoft Office and Focus Multimedia Ltd and used with permission under the terms of the respective product licences.
4 mocktail recipes to be made during a practical lesson of Hospitality studies (one for each of the 4 mixing techniques).
A PowerPoint designed for use in a theory lesson which goes through a range of beverages and their preparation steps. It begins by explaining what mocktails are. It goes through some of the carbonated beverages and soft drinks commonly used in mocktails. There are images of a range of kitchen utensils commonly used when making mocktails. This is followed by an explanation of the 4 techniques used to make mocktails (build in a glass, shake n strain, stir in a jug and blend.) Example mocktails for each preparation type are provided. this is followed by information about different glassware including lowball glass (tumblers), martini glass, hurricane glass and margarita glass. The lesson then moves onto other beverages common to cafes and restaurants. It begins with common fruit juices, handcrafted sodas, frappes, iced teas. This is followed by a range of milk-based beverages including: smoothies, milkshakes, flavoured milks, hot chocolates, iced coffees. This is followed by a run down of the various types of teas organised under categories: black, green, oolong, Ceylon, herbal, floral and fruity. This is followed by information about non-espresso coffee types: instant, plunger, percolator, filter, pods and Turkish.
Also included is a PPT (at the base of the original PPT) about how to write procedural texts. It includes the three elements of a procedural text, an example for how to make pancakes, some tips for writing a procedural text and some activities for writing procedural texts for beverages they are learning about (coffees).
There is also a 13 minute ClickView video with 9 viewing questions for if time permits.
Resources designed for use in an 11 Hospitality Practices class in Australia (2019 curriculum). Unit 1: Introduction to Hospitality, Topic 1: Beverage operations and services. My school has 70-minute lessons. The assessment at the end of this unit was an examination (short response).
 Quick View
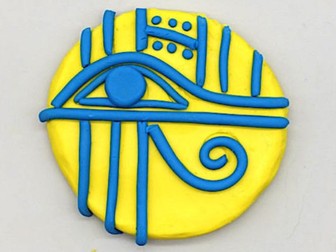 Quick View
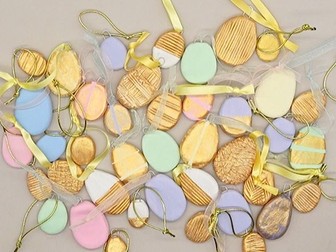 Quick View
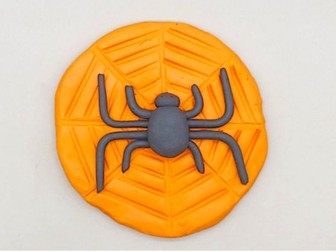 Quick View
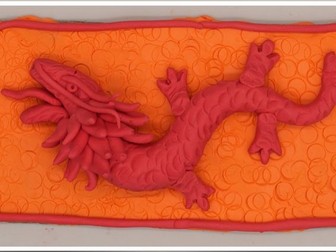 Quick View
 Quick View
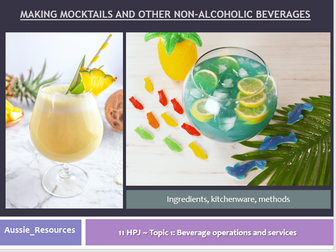 Quick View