I am a Primary Science teacher in Perth Australia. I enjoy developing resources for my students that encourage hands on inquiry and investigation. I would like to see my students develop a life long passion for Science and to become active advocates at conserving and protecting the Earth's precious resources.
I am a Primary Science teacher in Perth Australia. I enjoy developing resources for my students that encourage hands on inquiry and investigation. I would like to see my students develop a life long passion for Science and to become active advocates at conserving and protecting the Earth's precious resources.
This is a powerpoint to guide students through an individual investigation where they explore their nervous system. To conduct the investigation the students will need
one pin
1 paper clip
ice
a polystyrene cup
hot water
a fine tipped black texta
a piece of 1cm grid paper
The students will use a black pen to draw and 1cm grid on the back of their hand. In this grid they will use different materials to test out their sense responses. The students will make a duplicate grid on a piece of 1cm graph or grid paper. On this piece of paper they will record their responses using codes.
The final slide in this resource includes discussion questions.
To conduct this activity you will need to purchase about 10-12 Hexbug Nanos. I recommend fishpond.com. Explain to the students that Hexbug Nanos are robotic toys that move and react with sensors.
Explain to the students that they will be working in teams of three to construct and create their own maze. Firstly get the students to draw a maze design that they will be able to build. Give each team the lid from a box of A4 photocopy paper. Cut an entry and exit opening for the students. Get them to make a mark where they want the opening to be cut. Pre cut several strips of hard cardboard with a guillotine (this will make it easier and quicker for the students to commence construction). Students construct their mazes using the strips of cardboard and masking tape. When their maze is complete they can test it out with their Hexbug Nano. On the worksheet the students can measure and record the distance travelled by their Hexbug. Then the students are ready to conduct their trials. For each trial the students place their Hexbug at the entry point and using a timer record how long it takes for the Hexbug to travel through the maze and out through the exit. If the Hexbug gets ‘stuck’ they re to record at which point it gets stuck and then make improvements to the maze. The goal is to continually improve the maze so that the Hexbug improves it’s travel time with each trial. The worksheet includes further questions on evaluating their investigation.
The students make their own Scribblebots in teams of three.
Once the students have completed their Scribblebot’s conduct a brainstorm with the students and record their ideas on how they could test out their Scribblebot’s performance. Give each team very large piece of paper. Use the worksheet to plan the investigation and record data. At the conclusion of the activity each team presents their findings to the class and gives a demonstration on how they conducted their challenge.
This is an interactive investigation where the students are taken to a bushland setting in Perth Western Australia or have access to a bushland area on their school site. The students use the worksheet to guide their investigation about the Nyoongar season of
Kambarang which occurs in October/November
Djeran which occurs in March/April
Makuru which occurs in June/July
Djilba which occurs in August/September
There are several Nyoongar Six Season posters that can be purchased or found online. I purchased mine from SERCUL in Beckenham.
I do not have a worksheet for Birak. This season is over the Jaunary/December period and Australian students are on their summer holidays at this time.
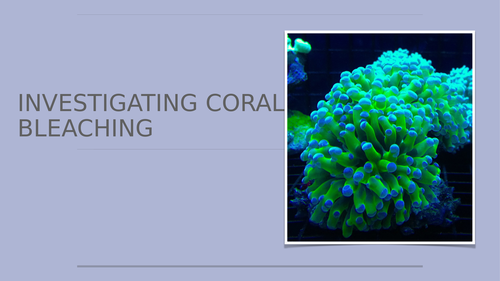
This is a powerpoint, youtube clip and worksheet that explains to students how to set up a fair test to investigate coral bleaching. Students will take two marine shells, weigh each shell then place one shell in a bowl of tap water and the other shell in a bowl of vinegar. Over the next week the students make observations and record the changes to each shell. There is also a worksheet to accompany this powerpoint. The worksheet is called ‘Investigating Coral Bleaching student worksheet’ . The students will make their own conclusions about the effect of Carbon Emissions on our coral reef ecosystems. The worksheet can be adjusted so that the investigation runs over a sorter period eg, one week.
Students will investigate the following question
‘How much soil is blown away when we use a straw to blow consistently on a landscape for 20 seconds?’
Students will take two containers and using a spoon fill each container to the top with soil from the garden. Then leave one container ‘dry’ and use a spray bottle to ‘dampen’ the soil in the second container so that it is moist. Students will weigh the dry soil and record the weight.
To conduct the investigation one student places the dry container at the end of an A3 piece of paper and sets the timer to 20 seconds.
The student places the tip of the straw at one end of the container and blows across the soil landscape for 20 seconds. They are modelling the effect of a strong wind.
The student weighs the container a second time (after blowing) and records the weight
Now repeat for the second (moist) container.
The powerpoint explains how to conduct this activity and includes review questions.
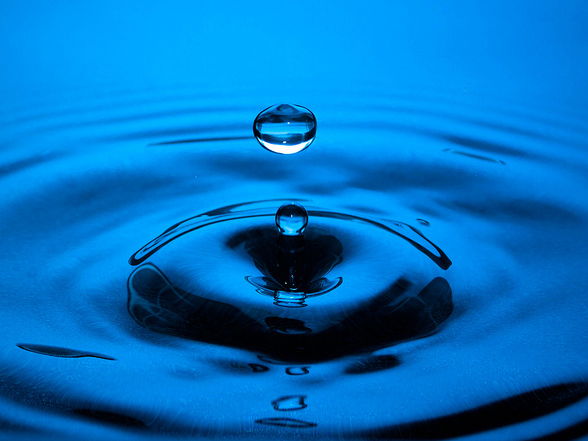
This resource includes a powerpoint presentation to guide students as they investigate water with their fives senses. Some of the activities include shining a torch onto the cup of water and dropping a marble into the cup of water.
Included is a worksheet for the students to record their findings about water.
For this investigation you will need to collect a very small amount of beach sand from your closest beach. Place some beach sand in very shallow trays. The students will be making a ‘sticky tape’ slide and then observe their slide under a microscope or magnifiers. There are ten slides in this resource which will guide the students into understand the components of beach sand and how it contains carbonate and no carbonate materials. The highlight is using drops of vinegar into a sample of beach sand and making observations to see if there is a reaction.
This product is a 7 slide presentation about owl pellets and how they are formed. It guides students to design and construct a small animal using Lego that could be a food source for an owl such as a rodent, frog, cricket, spider, moth, centipede. Students must build their animal and then create instructions by setting out the drawings of the Lego pieces on 1cm grid paper. You can also take a photo of their completed Lego animal to assist them with remembering how to build it. It conclude the lesson the students pull apart their Lego animal and pack it into a zip lock bag along with their instructions. In the follow up lesson the students swap their packages with another team and using the instructions and with help from the photos, try to build the animal.
This is a design activity with the final goal making a set of shoes made from a variety of everyday materials.
The students will test the following materials in this investigation.
wood
plastic
sponge
fabric
cardboard
There are 4 tests for the students to conduct.
Investigation 1 - Heating and cooling
Test each material by holding it against different surfaces for 1 minute and recording findings in a table.
Investigation 2 -Friction
Rub the material against different surfaces such as carpet, grass and paving for 1 minute to see if there is an effect on the material.
Investigation 3 - Force
Set a timer for 1 minute while standing on the material. Describe the material after standing on it.
Investigation 4 - Water
Immerse the material in water for 1 minute and recording findings in a table.
To conclude the investigation the students share their findings and decide on the best materials to use to make their set of shoes.
As a whole class the students made playdough. I found this to be the best recipe as it did not require cooking.
Ingredients
· 2 cups plain flour
· 2 tablespoons vegetable oil
· 1/2 cup salt
· 2 tablespoons cream of tartar
· 1 and a half cups boiling water (adding it slowly until it feels just right)
· food colouring (optional)
· few drops glycerine (secret ingredient for stretch and shine!)
Method
Mix the flour, salt, cream of tartar and oil in a large mixing bowl.
Slowly add boiling water into the dry ingredients.
Stir continuously until it becomes a sticky, combined dough.
Add the glycerine.
Allow it to cool down then take it out of the bowl and knead it vigorously for a couple of minutes until all of the stickiness has gone. This is the most important part of the process, so keep at it until it’s the perfect consistency.
If it remains a little sticky then add a touch more flour until just right.
Before the students were given their blob of playdough, we conducted a class brainstorm about all the ways we could manipulate it. These were recorded in our Class Science Journal eg, press, pinch, squeeze, roll, flatten etc. Then the students were given time to get creative.
Once the students had completed their model they were asked to use the words on the worksheet to describe how they formed and molded the dough. This is where the worksheet comes in handy as the students had a visual copy of the words. Students who struggle with literacy and to write a full sentence were encouraged to circle the words that they used to create their model.
This resource is a powerpoint to teach students about the different ways that fish move and what their bodies are covered in. Teachers could use this tool in several ways
as a factual text with each student choosing one species and conducting their own research about their chosen fish.
drawing a detailed picture of the fish with annotations.
teachers could get their students to draw a table in their Science Journals and use the information in the slides to classify different feature for each fish eg how is the body covered, how does it move, where is it found (in rock pools or deep ocean) etc.
For this investigation each team of students will need
a small container of sea shells.
a piece of coloured card A3 size.
textas
There are three slides in this resource
Title slide
Suitable to for Years 1-3 students. The students complete several sorting and classifying activities. They arrange their shells onto their A3 coloured card then use the words on the powerpoint to label their collection.
Slide suitable for Years 4-6. For this activity the students have a few more challenging tasks.
To conclude this activity the students can take a photo of their display with their iPads and upload to their digital online learning platform - eg Seesaw, Google Classroom, Freshgrade.
There are 8 slides in this powerpoint. The students are encouraged to look closely at a variety of images and make observations about the ancient drawings from the Kimberley region of Australia.
Delight your students with this chemical and physical changes quiz. Students can work in teams or individually to answer 10 quiz questions. The questions are presented on slides with images.
Here is the answer key
Perfume evaporating on your skin - physical.
Butter melting - physical.
Digesting food - chemical.
Burning fuel in a lawnmower - this one is NOT a physical change.
burn (combustion) - chemical, crumble - physical, melt - physical, rust - chemical, crush - physical, freeze - physical, grind - physical, rot - chemical
Fogging a mirror with your breath - physical.
Mending a broken bone - chemical.
Paper ripping - physical.
Glass cracking when placed in cold water - physical.
Slicing potatoes to cook fries - physical
The students were given the following materials to complete this investigation
a ruler
a large foldback clip with the steel pin removed - this is the fulcrum
several objects -small blocks, erasers, sharpeners etc easily sourced around the classroom. Plus a few heavier objects for investigation 3.
Investigation 1 - First class lever
The students set up their equipment to balance two objects
Investigation 2 - Second class lever
The students set up their equipment with the fulcrum at one end of the ruler and then balance two objects.
Investigation 3 - Third class lever
The students set up their equipment to lift a load.
In their Science Journal the students choose two of the investigation and draw a diagram including these labels - fulcrum, object and ruler.
This resource is a powerpoint to teach students about fish adaptations and how fish survive in their habitat. Teachers could use this tool in several ways
As a factual text with each student choosing one species and conducting their further research about the adaptations of their chosen fish.
Drawing a detailed picture of the fish with annotations to explain the adaptations.
Teachers could get their students to draw a table in their Science Journals and use the information in the slides to classify different features for each fish eg how is the body covered, how does it move, where is it found (in rock pools or deep ocean), how it finds it’s food etc
This is a set of PowerPoint slide to guide your students to investigate viscosity. Each team will need the following materials
one polystyrene cup with a hole in it
a small container of vegetable oil
a small container of honey
a small container of water.
Newspaper to collect the mess
timers
The students will take turn to pour each liquid into the cup and time how long it takes for the liquid to exit the cup.
To conduct this investigation with your class you will need two varieties of fish scales from two different species. This is so the students can compare two of the four main types of fish scale.
You can remove my images of herring and perch and replace with fish species that suit the ocean or waterways where you live.
The students will conduct their investigation and record their findings by drawing a detailed picture of their fish scale and identifying important features such as
•shape,
•thickness
•colour
•size
After careful observation of their fish scale under a microscope the students should be able to compare their scale to the diagrams on the powerpoint and be able to identify if the scale is placoid, ganoid, ctenoid or cycloid.
To use this resource firstly print off slides 2- 12. There are 10 stations. You will need to provide the materials at each station for the students complete the investigations.
Here is what you need to prepare
Slide 2 Iron filings and sand - in a tray add sand and a few spoons of iron filings. Students use a magnet to collect the iron filings.
Slide 3 Fizzing tablet and water - glass of water and a fizzing tablet such as Aspro Clear.
Slide 4 Inflate a balloon with vinegar - bottle, measuring cups, funnels, balloon, vinegar, bicarb soda.
Slide 5 Glowsticks - 2 glow sticks, 2 large beakers, 2 thermometers, 2 pieces of black card, icy cold water from the fridge, hot water from a kettle.
Slide 5 Burning candle - candle, large glass jar, matches.
Slide 6 Autumn leaves - a tray of autumn leaves, crayons, lithograph paper
Slide 7 Melting ice investigation - 2 petri dishes, ice cubes, salt, measuring spoons.
Slide 8 Milk and lemon juice - lemon juice, pipette, milk, glass beaker.
Slide 9 Investigating nails - 2 trays of nails (rusted and not rusted).
Slide 10 Plasticine - various colours of plasticine.
Slide 11 Chalk - various colours of chalk, paper
Print the recording sheet on Slide 12.
Allocate the students to the different stations and allow them to complete the investigation and record their findings on the worksheet.
Gather students together to share findings.
If you have time rotate students to another station.
Gather students together and conclude by sharing the Conclusions on the PowerPoint.