South Walian KS3, KS4 and IB Visual Arts teacher based in Hungary & textiles graduate from Falmouth Arts University. I like my resources to be fun, colourful and informative! Enjoy them :)
In this introductory lesson, students explore the elements of line, pattern, and colour to draw a vibrant “patterned landscape.” Through guided instruction, students learn how to experiment with repetition and arrangement to establish captivating patterns within their compositions. This lesson is great for cover and it has an interesting ‘register pattern bingo’ that the children love :).
You will need A4 paper and pens for your students.
This is 1 x A4 JPEG aid about ‘Experimental Drawing’. It is not a full lesson! It would be good to have in the middle of tables as a starter activity or something to allow pupils to do in groups or to use as a homework task.
It has some timed experiments such as; drawing with non-dominant hand and changing pen sizes and thickness etc!
This direct art annotation guide is great as a reference point inside the front cover of sketchbooks. It reminds students to consider key questions when annotating their artwork such as; What is it? Who made it? Why did they make it? How did they make it? Have you learned anything new?
There are additional prompts and statements within each of these areas to encourage deeper reflection.
I printed it A6 and then cut one for every student. For your convenience the resource is provided this way and large scale. Enjoy :)
This lesson is jam packed with the experimentation of various skills such as graphite, coloured pencil and watercoloured paint inspired by David Hockney. The lesson has all the explanations of each technique and a discussion point to start the lesson. On the worksheet, there are 30 technique prompts all together. I personally printed mine on A3 paper which gave the students more space to experiment with marks. However, you can print A4 for students who have more advanced skills developed and are able to apply marks intricately. In the ‘Graphite’ area the students are asked to use pencil and develop their knowledge of techniques such as shading, hatching, cross-hatching, short/medium/long lines, outlines etc. It will keep the students busy (if done properly) for at least two 1 hour lessons (maybe more). You can encourage the students to do their own research into each technique in pairs to extend the length of the task. At the bottom, there is a Hockney painting example which the students can recreate in different mediums. *Please note on the PowerPoint I did not recreate the Hockney painting in watercolour or coloured pencil so the students are just shown the reference image to work from.
Enjoy it!
An A4 textiles evaluation worksheet that encourages students to reflect on their learning at the end of a unit or term. There are 7 different prompt boxes that ask questions such as; ‘What skills have you improved in textiles this term?’ and ‘What lesson have you most enjoyed and why?’. If done properly, it should take around 15-20 minutes to complete. It is a great plenary or starter activity.
You can use this in both an Art or Textiles lesson. The resource has one plain tote bag template outline, which the students are asked to design with patterns and colours. Around the bag, it includes questions and prompts such as; colour choice, technique, fabric choice, artist inspiration, positives, design choice, motif and possible changes. There is a completed example sheet on the second page so you are able to show your students a visual examplar.
This is a wonderfully colourful, bright and informative A4 or A3 landscape textiles and fashion artists/designers poster for your classroom. There is one collum dedicated to Welsh textile artists and an interactive QR code for students to scan to see how Iris van Herpen’s clothing is made. Enjoy it :)
These 2 x worksheets are fantastic for the pre-comparative study gallery trip (I found it better to print A3 for space but A4 is also fine). It will help aid the students in what they need to do when preparing for the analysing of artworks. There are two spaces for quick sketches, a section for background information including artist name, medium, title of work and brief description. There are also sections for ‘initial thoughts’ with prompts and key words. In the top hand corner, there is a checklist of questions that the student will need to complete and two other sections for ‘links to own work’ and ‘function and purpose’. I have added a completed visual example/aid.
Enjoy it! :)
This is half an A4 landscape resource that has a weekly reward chart on it (for printing convenience I have doubled it on one A4). There is space for a student to write their weekly target (3 weeks worth) and then the teacher can tick every day they met that target. At the end of the week there is space for a teacher response comment and towards the top the student writes what they are working towards. I found this so helpful for SEN and ALN learners. I stuck the visual reminder on the inside cover of their books and then swapped it over every 3 weeks. Enjoy!
This resource includes a lesson and two worksheets (exactly the same but one has Welsh headings, and one has English) for support with artist research. It includes sections such as who, what, why, how and opinion. The students can record this research on this sheet and use it to help them create the visual research page later. I printed mine A4 landscape, and I gave one worksheet to each student.
The lesson breaks down what to write in every section of the worksheet with prompts. It is a great aid for students who have never done this before as it simplifies the research into small areas and sections. Please be aware that this PowerPoint has flat images rather than editable text boxes and images so you will not be able to edit the existing text on the document. This is not something that I can change. Enjoy it :)
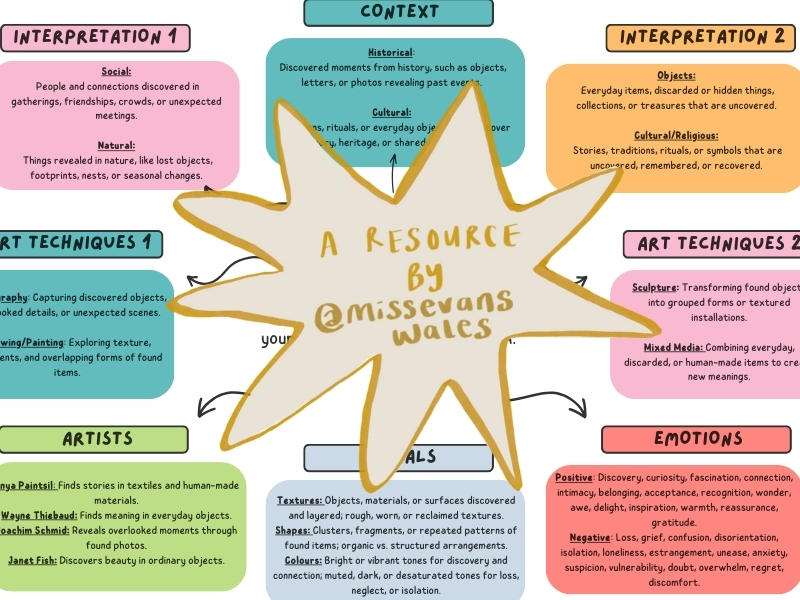
This is a fun, colourful A5 visual aid for ‘artist analysis’ tasks. It displays a mind map that shows students how to correctly analyse artworks with a keyword bank along the bottom edge for students who may need additional support. There are 5 different areas that include; content, mood, materials/media, facts and opinion. Within these section, there are sentence prompts and support. I used to print mine before laminating them and having them on the middle of every table.
*Please note the resource is doubled on one x A4 for printing convenience.
Enjoy :)
This A4 resource is specifically used in art lessons (the checklist is tailored for this subject). It is great to use at a mid-point in the term to reflect on learning and provide some formative assessment. There are three main areas for each student to complete; Strengths, Areas to Improve and Response. In each section, they will need to ‘self assess’ themselves using the traffic light method on the right-hand side. There is a space at the bottom for the teacher to write a comment and then a space where the pupil is able to respond.
Enjoy it! :)
This is an A3 ‘Diversity’ poster. It is more for teachers rather than students as you will recognise by some of the prompts and language. A very important discussion to have with staff and students alike! Great for classrooms or staffrooms.
This lesson is a great ‘filler’ lesson. You can use indian ink and oil pastels to create ‘Indian Ink Bugs’.
It includes a lesson PowerPoint (2 lessons in total) with information about how to draw the bugs in an experimental/fun way. Then the students are encouraged to add patterns before using some oil pastel blending techniques to work from dark to light. There is also two slides of bug templates that you are able to use with students who may struggle to draw the bugs from scratch.
To extend the lessons, you could photograph each students work and ask them to edit them digitally before using for pattern making workshops!
This lesson is great when you are on cover for art or you need a task with very little equipment and materials available. I have created a worksheet which corresponds with the lesson and it is broken down step by step so it is very easy to understand maybe for students who have limited ability or are new to tone.
The worksheets are best printed A4. All you will need is a worksheet and a pencil for each student. The lesson introduces what tone is and then the various parts of the eye. As a starter task, students will create a tonal ladder and give some feedback about different tonal eyes. They will move on to their step by step resource and work on shading before completing the title with tone as an extension task.
:)
This resource includes 3 lessons and 1 sugar skull template A4 sheet. I created this for one of my observation lessons when I was completing my NQT year and I got great feedback on how engaged the children were. It is particularly good for KS3 and children who tend to get distracted easily/have behavioural issues as it keeps them focused on timed tasks.
The PPT includes three lessons that are very simplified so the children have clear instructions for every step of the process. It will give them a certain amount of symbols to draw and shows them how to colour blend before they move on in lesson 3 to create an A3 background for their skulls.
Day of the Dead History
Drawing the skull using a template (provided)
Colour blending techniques (video by me included)
Exploring patterns for a background
Enjoy it as this is one of my favourite lessons :)
In this resource, you will receive an A4 print out for a ‘booklet/zine’ about the A-E of Embroidery Stitches (arrowhead stitch, backstitch, chain stitch, darning stitch and eyelet stitch). In the booklet, there are QR links to supporting tutorials for each stitch. One of the QR codes (page 1) will take you to a FULL LESSON specifically made by me for this resource. In this lesson, I show the students how to actually make the booklet (only scissors required) and go into details about specific needle uses, how to use a fabric hoop and how to carry out each embroidery stitch.
Enjoy it and please review if you like my resources as it helps support my page! :)
This worksheet is FREE for you :)
I printed mine A4 for my class. It has some small boxes for a textural rubbings lesson. You can use found objects such as coins, hair clips, lace etc. My suggestion is to use an oil pastel or a graphite pencil to create the rubbings as this often works better. The students seem to enjoy this lesson, especially if they are younger. You could extend the lesson by asking the students to compare one another’s marks and give each other feedback on what worked well and what could he improved. Enjoy!
A free worksheet for you! I kept the prompts as general as possible. I used it in art lessons but I am sure you can use them across other subjects. It follows the S-T-A-R assessment structure. Enjoy :)